Cook Like a Monger: Coconut Coriander Pasta with KariKari Chili Crisp 


by Austin Coe Butler 

If you’re ever wondering what to gift the foodie in your life, may I suggest a subscription service of a gustatory nature? I’ve been gifted bean club memberships, artisanal salami subscriptions, and monthly coffee shipments, all to my great delight and surprise. They’re a great way to be exposed to new and different foods you may not have encountered in your well-worn eating habits. Most recently I was gifted a subscription to Sfoglini, a New York-based pasta manufacturer that is best known for inventing a “new” pasta shape, cascateli or waterfalls. A recipe for pasta with a coconut coriander sauce came along with that month’s pasta and I thought I’d give it a try. While the dish turned out beautiful and quite tasty, I couldn’t help but feel like something was missing, and it was only the other night when the spring weather stirred me to make it again that I realized what it needed to shine: the sweet, garlic-y heat of chili crisp oil. 

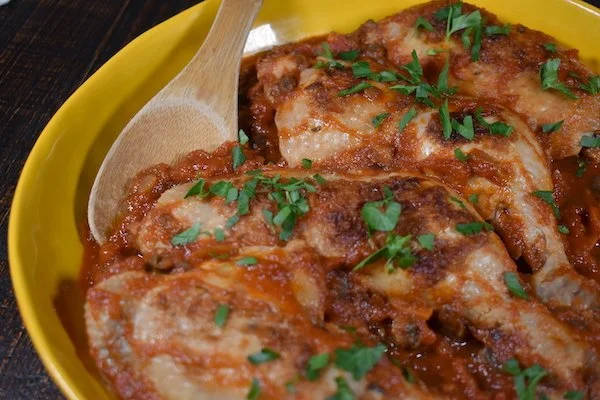
Chili crisps are “having a moment.” For the uninitiated, chili crisp usually refers to hot oil that is poured over chilis with other spices and aromatics to create a silken, fiery red oil that is good on literally everything. It’s the Sriracha of the 2020s. The Chinese Lao Gan Ma brand, with a stern looking woman on the front, exploded in popularity several years ago, and now it seems like everyone and their mother is making artisanal chili crisp. The Pura Macha brand salsa macha we sell in the shop, a Mexican chili crisp with lots of smoky guajillos, chipotles, nuts, coffee, and fruit, is exceptional and can turn something as plain as steamed chicken breast into a transcendent culinary experience. 

We recently brought a new chili crisp into the shop, Seattle-based KariKari, a Japanese-style chili crisp. What sets KariKari apart is that it is packed with golden slices of crispy fried shallots and garlic, which most chili crisps tragically skimp on. Many of the staff members, including yours truly, will openly admit to eating half a jar of it in one sitting, whether it’s paired with a cheese like Manchego, a decadent triple creme like Brillat Savarin, or just on plain noodles or a baguette. This chili crisp was what that pasta dish needed, and it totally transformed it, bringing all the flavors into balance with its sweet heat and leaving me craving more. KariKari chili crisp is on promotion this weekend, so stop into the shop to try it for yourself!

This pasta is an easy weeknight meal and can easily be made vegan with the substitution of coconut oil for butter.

Ingredients:

1 ½ tbsp coriander, toasted, and ground

4 tbsp unsalted butter

½ lb. or 8 oz. spinach

1 cup fresh or frozen peas

1 large yellow onion, sliced thinly

6 cloves garlic, minced or grated

1 lb. package of pasta, preferably a shape like rigatoni, busiate, or penne. I use cavatappi here.

1 in. knob ginger, minced or grated

1 14 oz. can unsweetened coconut milk

Cilantro leaves to taste

KariKari chili crisp to taste


Directions:

  1. Bring a large pot of abundantly salted water to a boil while you prepare your mise.

  2. In a Dutch oven over medium-high heat, melt 2 tablespoons of butter. Add the spinach and saute for just a minute or two until it begins to wilt. Then add the peas and heat them through, just another minute or two. Reserve the peas and spinach in a small bowl.

  3. In the same pot, add the remaining butter. Saute the onion until translucent and yielding, about 5 to 7 minutes. You’re not looking to develop any color, just soften the onions.

  4. Add the ground coriander and bloom the spices until fragrant, about a minute.

  5. Add the garlic and ginger and saute for another minute. Your kitchen should now smell amazing.

  6. Finally, add the coconut milk and bring to a boil. Reduce the heat to low, and simmer the sauce while you cook your pasta.

  7. Cook the pasta until 2 to 3 minutes before the time listed for al dente according to the package. My package of cavatappi said 9 minutes, so I removed the pasta at 6 minutes. The pasta will still be raw in the middle, but we’ll finish cooking it in the sauce so the flavors can marry.

  8. Add the pasta to the Dutch oven with the sauce along with a ladle of pasta water. Continue to stir the pasta and test it until it is cooked al dente or to your liking. A nice sauce should have formed in the pot from the addition of the starchy, salty pasta water. If it looks dry, add a half ladle of pasta water at a time. If it looks too watery, allow the sauce to reduce for a minute or two. Check for seasoning one last time, adjusting the salt as necessary.

  9. Serve, garnishing generously with cilantro, and a generous spoonful of two of glowing KariKari Chili Crisp.


Cook Like a Meatmonger: Lamb T-Bones with Blackberry Pan Sauce

by Matt Gruber

Lamb. Now, I'm not talking about The Treaty of Versailles, I'm talking about the delicious Ovis aries, or as we humble meatmongers refer to it: lamb. Mutton was a staple in the early 1900's but declined after WW2. Some time around 2010 the younger version (lamb as we know it today) began to gain popularity.

I was by no means raised on this variety of meat and never looked beyond the widely-consumed gyro meat. While that is a whole different scrumptious beast in and of itself (I have an adventurous at home recipe that the world isn't ready for yet... at least in writing) our cuts of lamb are the sleeper hit of the meat case. Compared to beef or pork, lamb has an earthy, rich, and sometimes gamey flavor, however all this is balanced with a slight sweetness. From a simple gremolata on a sirloin roast to a mustard and pistachio-crusted rack of lamb, we love to experiment with all kinds of preparations. In the spirit of Easter and spring, I created a wonderful blackberry pan sauce for some lamb t-bones. Paired with some roasted carrots, radishes, and mashed potatoes, I think this dish is perfect for any date night or holiday meal.

Ingredients:

2 Lamb T-bones per person

1 splash heavy cream

1 spoonful sour cream

1 sprig Fresh rosemary

1 tbsp ground thyme

2 tbsp dried oregano

15 blackberries cut in half (I used quite a bit due to my love of blackberries)

1 knob of butter

1/4 cup full body red wine, I used Leese-Fitch

1 cup chicken stock

2 russet potatoes

1 bag rainbow carrots

Directions:

  1. Season t-bones liberally with salt and pepper up to 48 hours in advance.

  2. Preheat oven to 450 degrees.

  3. Soak potatoes in cold water for up to 4 hours to remove starch. Once soaked, cut into 2" cubes.

  4. Toss carrots and radishes in olive oil, seasoning with thyme and oregano, plus salt and pepper. Lay on a sheet tray and roast for 25-30 minutes until browned.

  5. Boil potatoes in salted water until soft, 15-20 minutes, then mash with sour and heavy cream. Season to taste.

  6. When carrots are 10 minutes out from being done, preheat your favorite cast iron or heavy-bottomed skillet on medium, sear t-bones for 3.5 - 4 minutes per side for medium rare.

  7. Remove t-bones from the pan, setting them aside to rest. Add a knob of butter, wine, stock, blackberries, and rosemary sprig. Reduce until a spoon dragged across the pan leaves a streak in the liquid that stays a moment before vanishing.

  8. Plate lamb and veggies, drizzling with pan sauce. Enjoy!

Chicken Cacciatore

by Austin Coe Butler

While many regions of Italy claim ownership over this humble dish, which literally means “hunter’s style chicken,” it originated in Tuscany. Every family has their own “classic” version of this dish. It is also a dish that found popularity in America, where bell peppers, mushrooms, sage, and basil found their way in. Over the years I’ve found I prefer this simple, rustic version of chicken thighs simmered in a rich tomato sauce with briny capers, kalamata olives, and fragrant rosemary.

A curious culinary aside: This is one of the few “authentic” Italian recipes that features chicken. Most of the Italian chicken recipes that spring to mind are usually Italian-American in origin, when immigrants modified vegetable dishes for the abundant and cheap meat they found in the United States, for example substituting chicken for eggplant in “chicken parmesan.” In the cucina povera of Italian cookery, the poor coveted their chickens for their free supply of eggs, which could be cooked in an endless number of ways like frittata or uova in Purgatorio, and, of course, used to create pasta.

Ingredients:

4 chicken legs (You could substitute a whole chicken broken down or your cut of choice)

1 carrot, diced

1 onion, diced

1 rib celery, diced

2 sprigs of rosemary, plucked and chopped

1 cup dry white or red wine

2 tbsp tomato paste

1 500 g can Bianco di Napoli whole, peeled tomatoes, pureed

2 tbsp Les Moulin Mahjoub Wild Mountain Capers, rinsed and chopped

Twenty kalamata olives, pitted and chopped

  1. Make the sofrito. In a large pan over medium-high heat, add a generous amount of olive oil (about 5 tablespoons) and a clove of garlic. Add the carrot, celery, and onion and simmer for about five minutes. 

  2. Add the chicken skin side down, nestling it among the sofrito, and sear it for two minutes. Flip and cook for another few minutes. 

  3. Add the rosemary and chili while continuing to flip the chicken and stir the sofrito every few minutes until the chicken is nicely browned and the sofrito begins to caramelize. In this way, the sofrito will fry in the rendered chicken fat. 

  4. Deglaze with the wine and simmer for a few minutes (2-3) until you no longer smell the alcohol.

  5. Add the capers, olives, and tomatoes.

  6. Dissolve the tomato paste in about a ¼ C. of water and add it to the pan.

  7. Bring the sauce to a boil then cover the pan and drop the heat to low. Let it simmer for 15 minutes.

  8. Uncover the chicken, check for seasoning and adjust as necessary. Simmer for another 15 minutes, adjusting the lid as necessary to thicken the sauce.

Garnish with parsley and serve with a little bread to wipe up all that sauce and fa la scarpetta!

Cook Like a Meatmonger: Turkey 'n' Biscuits

by Matt Gruber

Have you ever gone into a grocery store, covered your eyes and just started picking out random items from each aisle? Yeah, neither have I - but sometimes I look in my fridge and feel that way. How am I gonna be resourceful and use all this leftover produce and why do I have this meat I didn't really have a plan for? I have a soft spot in my life for ground turkey. Many moons ago when I lived in the wonderful (up for debate) home of the Buffalo Bills, Buffalo NY, I tried to kick red meat and switch mainly to chicken and turkey. I have had wonderful success subbing turkey for so many of my red meat recipes and just exploring and inventing new recipes with it. I have always had a soft spot for chicken pot pie, but my partner in thyme didn't share this love. However, she did love biscuits. This is when I started cooking up something that is Space Odyssey 2023. This time around I am going to try something new and do a spin on chicken pot pie.. except no chicken, and no pie. Turkey pot pie? Turkey hot dish? Turkey biscuit bake? I haven't trademarked the name yet but we will get there. A fairly easy comfort dish that you can do all in your cast iron. Going a bit out of the norm I am adding baby sweet peppers, red pepper flake, and rosemary to my recipe..

Feeds 2-4 people (2 people with leftovers)

1 package of your favorite premade biscuits (make your own to elevate, some things call for shortcuts in my book)

1# ground turkey

1/2 onion

4 baby sweet peppers

2 carrots - diced

2 celery stalks - diced

1/3 cup flour

1 cup chicken stock

1 cup water

1 tbsp lemon pepper

1 tbsp rosemary

1 tbsp umami seasoning

1 tbsp lemon pepper

1 shake red pepper flakes

2 cloves garlic - minced

4 sprigs of thyme, taken off stem

1 tbsp cream cheese

1 knob of butter, melted

salt and pepper to taste

Directions

  1. Heat a cast iron pan over medium flame. Add a drizzle of oil.

  2. Add ground turkey and spices. Cook until browned. Set aside.

  3. Add more oil if pan appears dry. Add your diced veggies and cook until softened.

  4. Add minced garlic and thyme and cook until aromatic.

  5. Add 1 cup stock to the pan, bring to a simmer.

  6. Whisk together 1/3 cup flour and 1 cup water. Slowly whisk into stock mixture.

  7. Preheat oven to 425

  8. Add browned turkey back into mixture along with the 1 tbsp of cream cheese.

  9. Place biscuits on top of mix and brush with melted butter

  10. Bake in oven for 13-14 minutes until biscuits are golden brown

  11. Serve and enjoy!

Cook like a Cheesemonger: Dublin Coddle


by Austin Coe Butler

1 lb. Bacon, cut into 1 inch pieces

1 lb. France 44 OG Brats, cut into 1 inch rounds

2 cups Stock (Beef, Pork, or Chicken)

2 lbs. Russet potatoes, peeled and cut into 1/8s

2 large yellow onions, sliced thin

1 14.9 oz can of Guinness

1 tbsp AP Flour

3 cloves of garlic, minced

2 Bay Leaves

3 tbsp Parsley, chopped

If you’ve ever been to Ireland, and especially Dublin, you’ve probably encountered Coddle. Coddle is more often called Dublin Coddle because of the city’s fondness for the dish; it was a favorite of many of the city’s preeminent writers: James Joyce, Sean O’Casey, and Jonathan Swift. It’s fundamentally a city-dwelling, working class dish with the substitution of bacon and sausages in place of mutton.

Like most traditional dishes, there’s no real recipe. Everyone has their own version, and coddle originated as a way to use up leftovers: typically made on a Thursday to use up all the rashers (bacon) and sausage before Friday—when Catholics abstain from meat. But what every recipe has in common is bacon, sausages, onions, and potatoes stewed for several hours in a low oven. (The dish’s name is derived from the French caudle “to boil gently or stew.”)

This is a rich, rib-sticking stew, and (if you’re not already laying into a few pints while you stew it) the intoxicating smell will rile your appetite. Mop it all up with some soda bread from the shop for a hearty stew that will be enough of a buffer for a few more pints, or as a late night meal to come stumbling home to.

  1. Preheat your oven to 300º.

  2. Render the fat from the bacon and sear the sausages. Place the bacon in a cold, heavy bottomed pot like a Dutch oven and turn the heat up to medium. Render until crisp. Remove from the pot, then sear off the sausages. Our sausages are already fully cooked sous vide, so you don’t have to worry about cooking them, just get some nice color on them.

  3. Pour off most of the fat, leaving about two or three tablespoons in the pot. Over low heat, add the flour and whisk for a minute or two to cook off the raw flavor. Add the beer while whisking to create a thick brown gravy. Turn off the heat.

  4. Layer half of each of the following ingredients in this order: potatoes, onions, garlic, bacon, sausage, bay leaf, parsley, then repeat once more.

  5. Pour over the two cups of stock over and top with a well fitting lid. Place it in the oven to “caudle” for 2 hours or up to 5. 

  6. Serve with a soda bread to mop it up and a pint of Guinness to wash it down. It ain’t pretty, but it’s pretty good!


La Carbonara di Luciano Monosilio


by Austin Butler

At Luciano Cucina Italiana in Rome, each bowl of Carbonara comes with a small card clipped to it by a clothespin and is accompanied by a golden fork. Inside the bowl is a high bird’s nest of pasta glistening with silky sauce and crisp cubes of guanciale, cured pork cheek. The presentation, while a little ostentatious, proudly centers Carbonara as the king not just of Roman cuisine, and of Luciano’s as well. The brilliance of Luciano’s recipe is in the technique. He uses a bain-marie or double boiler method to temper the eggs and cook the sauce. Then, he drizzles in guanciale fat to essentially make hollandaise with the rendered fat, cheese, and eggs, resulting in an airy, silky sauce that is really remarkable. If this all seems too fussy, feel free to proceed as you usually would with your preferred technique and with the same ingredients and measurements, but the reward is in the technique and thought Luciano has put into this quintessentially Roman dish. There’s a reason Romans call Luciano Il Re della Carbonara, the Carbonara King.

Guanciale is cured pork cheek or jowel (guancia) essential to Carbonara. Pancetta would be the best substitute. I would not recommend bacon, as it is heavily cured in sugar and lacks the pepperiness and gaminess of guanciale.

Ingredients:

280 g Morelli Pici or Makaira Chitarra Spaghetti 

200 g Smoking Goose Guanciale diced into ½ inch cubes

30 g Cravero Parmigiano Reggiano grated

20 g Locateli Pecorino Romano grated

4 egg yolks from Locally Laid Eggs

2 g Mill Pepper Co. Ltd Black or Red Kampot Peppercorns

  1. In a dry pan, toast the peppercorns until fragrant and then crush coarsely, preferably in a mortar and pestle.

  2. In the same pan over medium heat, sear the guanciale before dropping the heat to low and letting it heat through so that it is crisp outside yet soft inside. Reserve the guanciale on a paper towel and about half the rendered fat.

  3. In a pot of boiling salted water, cook the pasta to about 2 minutes short of its prescribed time. I like to use Pici or Spaghettoni (thick spaghetti).

  4. In a bowl large enough to sit over your pot of boiling water, combine the Parmigiano Reggiano, Pecorino Romano, pepper, and egg yolks together and whip into a thick paste. Place this bowl over your boiling water as the pasta cooks and beat, monitoring the heat and removing it if need be so that the egg doesn’t curdle. On for a few seconds and then off for a few seconds should work. You’ll notice the mixture begin to lighten in color and become glossy, creamy. Then slowly whisk in the reserved guanciale fat, as you would with clarified butter in a hollandaise sauce.

  5. Off the heat, add the spaghetti with a little pasta water to the bowl with the sauce. Add the reserved guanciale. Toss to combine. Add more pasta water as needed to reach your desired consistency—I like to have the sauce look a little loose, knowing that it will tighten up as it cools.


Take a tongful of the Carbona and twist it inside the ladle to create a bird’s nest of pasta. Serve it in a warm bowl or plate before finishing with a dusting of Parmigiano Reggiano, pepper, and any guanciale that’s left in the pan. Buonissimo!


Cook like a Monger: Mandarinquat Mojo Pork


by Matt Gruber

After dipping my toes into chili verde and enjoying a taste of summer, I decided to take my pork adventures a bit farther east over to Cuba: Mojo, Pork Mojo (as one famous British spy maybe once said). Mojo in its origin means sauce. Typically it's prepared with some variety of pepper, olive oil, garlic, paprika, cumin, and coriander. Traditionally you see a green or red take on this sauce being used on any variety of meat from sea to land. If you venture into other parts of the Caribbean you will find a similar Mojo with robust citrus, cilantro, and garlic, almost exclusively used on pork. Keeping it fairly simple and to the point I stuck to the heavy citrus with the addition of Mandarinquats. A funny small fruit being the result of kumquats and satsuma mandarins packs a nice tart pulp with no lack of juice- it was the perfect addition to this dish. An easy recipe for a lazy day slow cooker meal or a few hour dutch oven braise. Guaranteed to have your house smelling good and your belly nice and happy. Paired with Rancho Gordo black beans you cannot go wrong.

Ingredients

1# Pork shoulder or Boston butt

3 cloves garlic, minced

2 tbsp ground cumin

1 lime zested and juiced

1 lemon zested and juiced

4 mandarinquats zested and juiced

1 qt chicken stock

1/2 bunch cilantro

salt and pepper to taste

1 cup orange juice with pulp

1. Brown pork on all sides for 3-4 minutes.

2. While pork is browning, mince garlic, zest lemon, lime, mandarinquat, and chop cilantro. Place aside in a bowl.

3. Get your dutch oven or crockpot ready by placing 1 qt of chicken stock, 2 tbsp ground cumin, citrus zest, and 1/2 cilantro inside. (leftover cilantro for garnish)

4. Take browned pork and place inside the preferred cooking vessel and let go for 2hr in a dutch oven at 375 or 4hr in a slow cooker on high.

5. Shred pork once it has reached 210 degrees or higher, plate over rice and beans with cilantro garnish and a spoonful of cooking liquid.

I really enjoyed this dish with black beans and white rice. A bean booster I have been doing adds bay leaf, a dash of cumin, oregano, lime juice, and a splash of white vinegar.


Cook like a Monger: Gigantes Plaki


by Austin Coe Butler

Obsessions are difficult to explain. By their nature they defy explanation and reside outside of reason. So I will just tell you that I have become obsessed with Rancho Gordo beans, and that this obsession has turned me into the kind of person who eats beans at least three times a week, has a bean club membership, buys clay pottery and cazuelas exclusively to cook beans in, and has about thirty pounds of dried beans in my larder. And being bean obsessed, one of my favorite bean dishes has become Gigantes Plaki, a Greek baked bean dish packed full of vegetables; it has a delicious agrodolce sauce of tomatoes, vinegar, and honey, and highlights glorious, giant beans. Made on a lazy Sunday or afternoon, you can eat Gigantes Plaki throughout the week, though I doubt it will last that long. The Greeks use a bean called Gigandes (literally “Giant”), but we sell these incredible Royal Corona beans from Rancho Gordo that are a perfect substitute. Royal Corona beans are truly regal beans that demand to be the center of any dish they’re in. When cooked, they can reach the size of your thumb. Their thick skins and densely creamy interior make them perfect in soups, stews, and salads, or marinated, baked, and sauced like pasta. 

Ingredients:

1 bag (1 lb.) Rancho Gordo Royal Corona Beans 

3 cloves garlic, sliced

1 leek, sliced

1 red onion, diced

¼ cup parsley, minced

¼ cup dill, minced

1 lb baby spinach, roughly chopped

1 stalk celery, diced

250 g Bianco di Napoli tomatoes, crushed or blended 

2 tbsp Bianco di Napoli tomato paste

2 oz. honey, preferably a more savory type like pine, buckwheat, or chestnut honey

¼ cup La Guinelle Banyuls red wine vinegar

½ cup EVOO

½ lb. Essex Lesbos Feta

  1. Check the beans for debris and rinse them. Soak them in plenty of cold, fresh water so that they are covered by at least two inches of water. Add a generous two finger pinch of salt to the water; this won’t make the beans tough. I don’t normally soak dried beans before cooking them, but because of the brobdingnagian size of these beans, a soak of at least eight hours, overnight, or even 24 hours helps them hydrate and cook more evenly and quickly. If you don’t soak them, expect the time it takes to parcook them to be anywhere from 1 to 5 hours. I choose to soak them for 24 hours and cook them in their soaking liquid with 1 bay leaf in an Instapot pressure cooker on high for 12 minutes. (If you choose to cook them in fresh water, add salt to the water again.) If you are using a traditional stovetop pot instead of a pressure cooker, the time to parcook the beans should take around an hour to an hour and a half. The beans need to be parcooked, though, otherwise they’ll turn to mush in the oven. Test them from time to time to see if they are still toothsome with a bit of graininess. A good indicator is to squeeze one and see if the cotyledons slip from the skin and easily split in half. 

  2. Meanwhile, prepare the spinach by salting it in a large bowl or colander and massaging it until wilted. Allow it to drain for 10 minutes then squeeze as much water out as you can. Roughly chop the spinach and reserve it in a large bowl.

  3. Prepare the remaining vegetables and herbs, placing them in the large bowl with the spinach. For the leek, use only the white and light green parts. Split the leek in half and then cut ribbons about an ⅛ inch wide. Rinse these in a bowl of water to remove any sediment and allow them to sit for 5 minutes. The sand should sink to the bottom and you can skim the clean, floating leeks from the surface. 

  4. Once the beans are par cooked, remove them from their cooking liquid and place them in the large bowl with the vegetables. Add the red wine vinegar, olive oil, crushed or blended tomatoes, tomato paste, honey, and a generous pinch of salt. Fold them gently to combine and avoid splitting the beans. Pour this mixture into a 9x12 casserole dish. If there isn’t enough liquid to just cover the beans, add some of the bean broth or water. Place a sheet tray under the casserole dish to prevent any liquid from bubbling over onto the oven.

  5. Bake in a 350º F oven and for an hour to an hour and a half. Test a bean for doneness. It should be creamy, buttery, without any graininess and a rich sweet and sour sauce should have formed.

  6. Allow to cool for ten minutes before topping with feta, fresh parsley and dill, and, if desired, a long, golden thread of olive oil.


    Questions, comments, or concerns about this recipe or others I’ve written? Write to me at austin@france44.com. Did you make this recipe? Take a photo of it and tag us in it @france44cheese! #CLAM


Cook like a Meat Monger: Pork Chili Verde

by Matt Gruber

“In the depth of winter, I finally learned that within me there lay an invincible summer.” -Albert Camus.

Early in life I was inspired by Camus and his philosophies. While he isn't known for his passion for food, strong flavor, or cooking, he is known for absurdism and some cornerstones of philosophical thinking. For me, cooking is very philosophical, questioning things like why Thai sweet basil instead of purple basil? Should I leave my steak out to come to room temperature before cooking? Why do I want dried beans instead of canned beans? After cooking someone's recipe once, I always question it and begin to tweak it in my own way, seeking purpose for my changes and enhancements. Currently in the depth of winter, I am bringing you my take on a recipe I am deeply passionate about : Pork Chili Verde.

I remember my first few months as a Meatmonger in Saint Paul: the man himself, Nick Mangigian, was asking me what's something good I have cooked recently. In a slump, I honestly didn't have anything interesting or creative I had cooked outside of assembling a peanut butter and pickle sandwich (honestly you have to try it, trust me).  He recommended a simple yet delicious recipe - Chili Verde. I was intrigued, cooking dishes from Mexican origin was always a staple in my household. I gathered what supplies I could from the shop and was off to get my peppers and other ingredients from the co-op. After cooking the dish I was floored, such simple seasonings from the spice cabinet and most of the flavor coming from the peppers and tomatillos, it was a dish to cry for. I was hooked, cooking it with chicken, beef, and pork I just couldn't get enough. To this day its one of our favorite things we recommend to customers. This time around I am using the addition of Pork Osso Buco to add a bit of extra flavor and collagen. Strap in and buckle up, this recipe will warm your soul and open up your own invincible summer during these last cold winter nights.

My take on this recipe uses less poblano peppers, the addition of carrots and their green tops for a welcomed sweetness and earthiness, and the secret ingredient- Secret Aardvark Serrabanero. You'll just need a dutch oven and an immersion blender to replicate this dish.

Feeds 2 people with leftovers, 4 people one meal.

Prep time : 1hr

Cook time : 2hr

Ingredients

1 tablespoon cumin

4 cloves garlic

2 carrots with green tops

2# tomatillos with husk

1 green pepper

1/2 poblano pepper

1 jalapeno pepper

1 serrano pepper

1 onion, save 1/3rd for garnish

2 1/2 cups chicken stock

salt and pepper to taste

1/2# Pork shoulder cubed

1# Pork Osso Buco

1/2 cup Secret Aardvark Serrabanero

1. Preheat the oven to 425. Dehusk your tomatillos, slice peppers, carrots with stems, and onion. Deseed peppers to preference of heat, and place all ingredients on a baking tray.

2. Place sliced ingredients from step one in the oven. cube up pork shoulder and salt and pepper to taste. Set aside pork until you've let step 1's ingredients cook for 15 minutes in the oven.

3. Turn the oven up to broil and cook ingredients for another 10 minutes or until a bit charred and soft. Preheat the dutch oven on medium high heat for 5 minutes. Place pork in a dutch oven with some extra virgin olive oil, brown pork then remove and set aside in a separate vessel.

4. Remove peppers, tomatillos, carrots and onion from the oven and place in the dutch oven. Add cumin and Serrabanero hot sauce. Place 2 cups chicken stock into the veggie mixture and use an immersion blender to blitz until all chunks are gone and consistency is that of a thick salsa.

5. Set the oven to 350. Place pork into freshly blended mixture and cook in the oven with lid half on for one hour. After one hour, stir and add 1/2 cup more chicken stock. Place back in the oven with the lid half on for another hour.

6. During this period you can cook your rice. I picked Jasmine rice because it's what I had around, any rice will do honestly. After your rice is cooked and the pork has braised for another hour, assemble and enjoy. Garnish with cilantro, diced white onion, and a squirt of lime juice. 

Cook like a Cheesemonger: Steak au Poivre

by Austin Butler

We have an incredible new product tucked away on our shelves—green salt-cured peppercorns from Cambodia. They are bright, salty, and spicy, with a vegetal kick that’s right at home in a bowl of green curry. But I wanted to try them in a bistro classic that’s perfect for a Valentine’s Day menu: Steak au Poivre. Nowadays you see Steak au Poivre made with black peppercorns, but traditionally it was made with brined green peppercorns. This dish sauce comes together quickly like most bistro dishes (bistro comes from the Russian быстрее or “quicker!”). Served alongside a simple salad and a potato dish like Pommes Lyonnaise or Fondant Potatoes, you have a meal to swoon over.

Steak of your choosing (I used 2 x 8 oz. New York Strips)

1 shallot, minced

200 g. crème fraîche (about one 8oz container)

3 tbsp unsalted butter

50 g/ 3 tbsp Mill Pepper Co. Ltd Green Kampot Salt Cured Peppercorns

3 tbsp Brandy / Cognac (I used Lustau)

1 c beef stock

Parsley

Tips: While the flambé is optional, I highly recommend it. Besides the impressive display, it gives you a visual cue when the alcohol has cooked off. Brace yourself for a WHOOSH! And be sure to have adequate clearance above the range and stand back lest you lose your eyebrows.

  1. Lightly season the steak with salt and then generously season it with black pepper. The green peppercorns are cured in salt and will be our primary source of salt. Use unsalted butter and, if you’re using another brand of beef stock, be sure to use low sodium or no sodium stock.

  2. Cook the steak to your desired preference. I allowed the New York Strips to temper for an hour and then pan seared them over high heat for about 4 minutes each side until the internal temperature read 135º (medium rare). Remove them from the pan and allow them to rest while you build the pan sauce. Remove any excess oil from the pan.

  3. Return the pan to medium heat. Add a knob of butter and the shallots to the pan and scrape up the fond.

  4. Add the green peppercorns.

  5. Add the cognac or brandy. Flambé! Reduce the sauce to almost nothing.

  6. Add the beef stock and reduce for several minutes until it is syrupy. You can use France 44 Demi instead of Beef Stock to speed this process up.

  7. Add the crème fraîche slowly to prevent it from breaking.

  8. Reduce the sauce until it coats the back of a spoon and a clean line is left when you drag a finger across it. Taste it and adjust the seasoning accordingly. I usually add more freshly cracked black pepper. 

  9. Serve over the steak and garnish with parsley.

Note: these NY Strips had a pretty significant fat cap, but that could be trimmed down per your preference.

Order Online