Cook Like a Monger: Old Fashioned Pork Ribs

By Matt Gruber

Good morning, good afternoon, good evening. Most of those times of day are when I like to enjoy some good ol' fashioned BBQ Ribs. Oddly enough, ribs haven't always been a "pit" staple. It wasn't until the 20th century that people started really dabbling with barbecued ribs. Part of this has to do with people neglecting the tougher and gristle heavy cuts of the animal. Most people were delighting themselves with the more tender and easier to deal with cuts.

I myself felt lost and confused that I couldn't recreate the delight I have had from smoked ribs in my travels down south at places like Papa Turney's Old Fashion BBQ in TN - and even right here at home at places like Ted Cook's 19th Hole in Minneapolis. I was stuck on the idea of needing a smoker to have tender, fall off the bone barbecue at home. Turns out all I needed was patience, acceptance of no smoke, and an oven that can hold a low temp (I think this one is pretty common).

Pork ribs are such an easy day off food that I believe everyone should explore. Leftovers for a breakfast hash, pull off the bone for a lunch sandwich, or a full on spread for a picnic inside dinner, this is how you start your new obsession.

Ingredients for homemade BBQ sauce:

1 cup chicken broth

½ cup ketchup

1 cup grated onion

2 tablespoon Worcestershire (highly recommended Col Pabst)

1 tablespoon mustard

2 tablespoons apple cider vinegar

1/3 cup brown sugar

1 tablespoon onion powder

1 tablespoon garlic powder

¼ cup molasses

Optional - 2 teaspoons your favorite hot sauce

For the rest, all you need is pork ribs and your favorite sides

  1. Salt and pepper pork ribs 24 hours ahead of time

  2. Preheat oven to as low as 200, but somewhere between 200-215

  3. In a small sauce pan add together all BBQ ingredients and salt and pepper to taste

  4. Whisk together and reduce until sauce consistency and set aside

  5. Place ribs in oven uncovered on middle rack, sit back and relax.

  6. Once the ribs reach an internal temperature of 200, glaze with BBQ sauce and broil until internal temperature reaches 215 and has a nice bark.

There you have it, it’s mostly a waiting game until 215. You cannot screw this one up! Depending on the size of the ribs, allow yourself ~1 hour per pound, maybe even a bit more is a good rule of thumb. Also, don't be ashamed to just use some good old Sweet Baby Rays either (not a sponsor).

Cook Like a Monger: Oxtail Ragù

by Matt Gruber

One of the greatest joys of working behind the counter at any of our locations is talking about food and recipes with customers. Oftentimes, sharing and exploring new corners and regions of dishes I never would have thought to explore or combine.

One afternoon a customer proposed the question “Is oxtail the right cut for my ragù?” Stumped for a moment, I admittedly had no idea. So, the conversation evolved and I found myself bringing home an oxtail to put it to the test. I love oxtail as much as the next person but had never worked with it at home. A bit unsure I grabbed some ground pork just to be safe. After doing a bit of research I had no idea I was walking into a classic Roman style Ragu - coda all vaccinara. Ragu in the style of the butcher. It was meant to be. Caught up in an 18th century dish I never knew I needed in my life.

The sheer velvetiness of the sauce caught me off guard. The oxtail is traditionally served on the bone, so I wanted to try that for my first experience with the recipe. It can be a little awkward though, so I would recommend shredding the meat. This ended up being one of the best meals I’ve created in a long time.

Ingredients:

1 QT Beef Stock

1 Package Spinosi Pappardelle

1 Oxtail

⅓ # ground pork

1 Medium onion, diced

2-3 Stock of celery, sliced into half moons

4 Cloves of garlic, sliced thinly

Fresh basil to taste, I put a few leaves in the sauce while reducing 

1 Jars LC (La caterdral de navarra) 

2 Jars Bionatura Strained Tomatoes 

Salt and Pepper to taste

1 block Cravero Parmigiano Reggiano

Steps:

  1. In a large dutch oven, brown ground pork and oxtail ~3-5 minutes a side over medium heat

  2. Add garlic, onion, celery and half of the beef stock and bring to a boil

  3. Add the 3 jars of tomatoes with the rest of the beef stock and simmer

  4. Continue to reduce until you have a thick sauce, approximately 4-5 hours occasionally scraping the fond off the sides.

  5. Bring 5L of water to a boil, then cook the pappardelle for 3-6 minutes or until al dente

  6. Shred meat off of the oxtail bone and return to sauce.

  7. Assemble a bowl and garnish with fresh basil leaves and grated Parm. And there you have it, a simple yet outstanding ragù. 

Cook, serve, delicious

Tomato Feta Galette

by Sean Lawrence

The humble galette, the short rustic pie that it is, excels as a format for showing off simple yet delightful ingredient combinations. In this case: the beautifully sweet and ripe tomatoes at the very end of the season, salty and tangy feta, and herbs fresh from the garden (I used mint and parsley, but also recommend: basil, tarragon, chives or thyme)

Dough

1 cup AP flour

6 tbsp cold unsalted butter, cubed

1/4 tsp kosher salt

1/2 black pepper

1-2 tbsp ice water

Filling

4 oz Essex St. Lesbos feta

2 medium tomatoes

2-3 tbsp fresh herbs

Kosher salt

Olive oil

Combine flour, salt, and pepper. Blend in cold butter with a pastry blender or sturdy fork, or by pulsing in a food processor. Add water in small increments until it forms a loose crumbly dough. Form into a ball, wrap with plastic wrap, and refrigerate for at least one hour.

While waiting for the dough to chill, cut tomatoes to 1/4 inch slices. Lightly salt both sides and place on towels to drain. Crumble or dice feta. Chop herbs and reserve about a tablespoon for garnish.

Preheat oven to 425. Roll out chilled dough to a 12 inch circle. Trim the edges into a clean edge if desired, or leave the uneven edges for a more rustic feel. Transfer dough to a baking sheet. Arrange feta on the dough, leaving 1.5 inches along the perimeter to later fold over. Next layer herbs, then drained tomato slices, and a drizzle of olive oil. Fold and pleat the outer edge of dough, pinching the corners of each fold to stick them together. Bake 20-25 minutes, until golden brown and fragrant. Allow to cool briefly, then slice and serve with herbs and more olive oil.

Pomodoro 2.0

by Austin Coe Butler

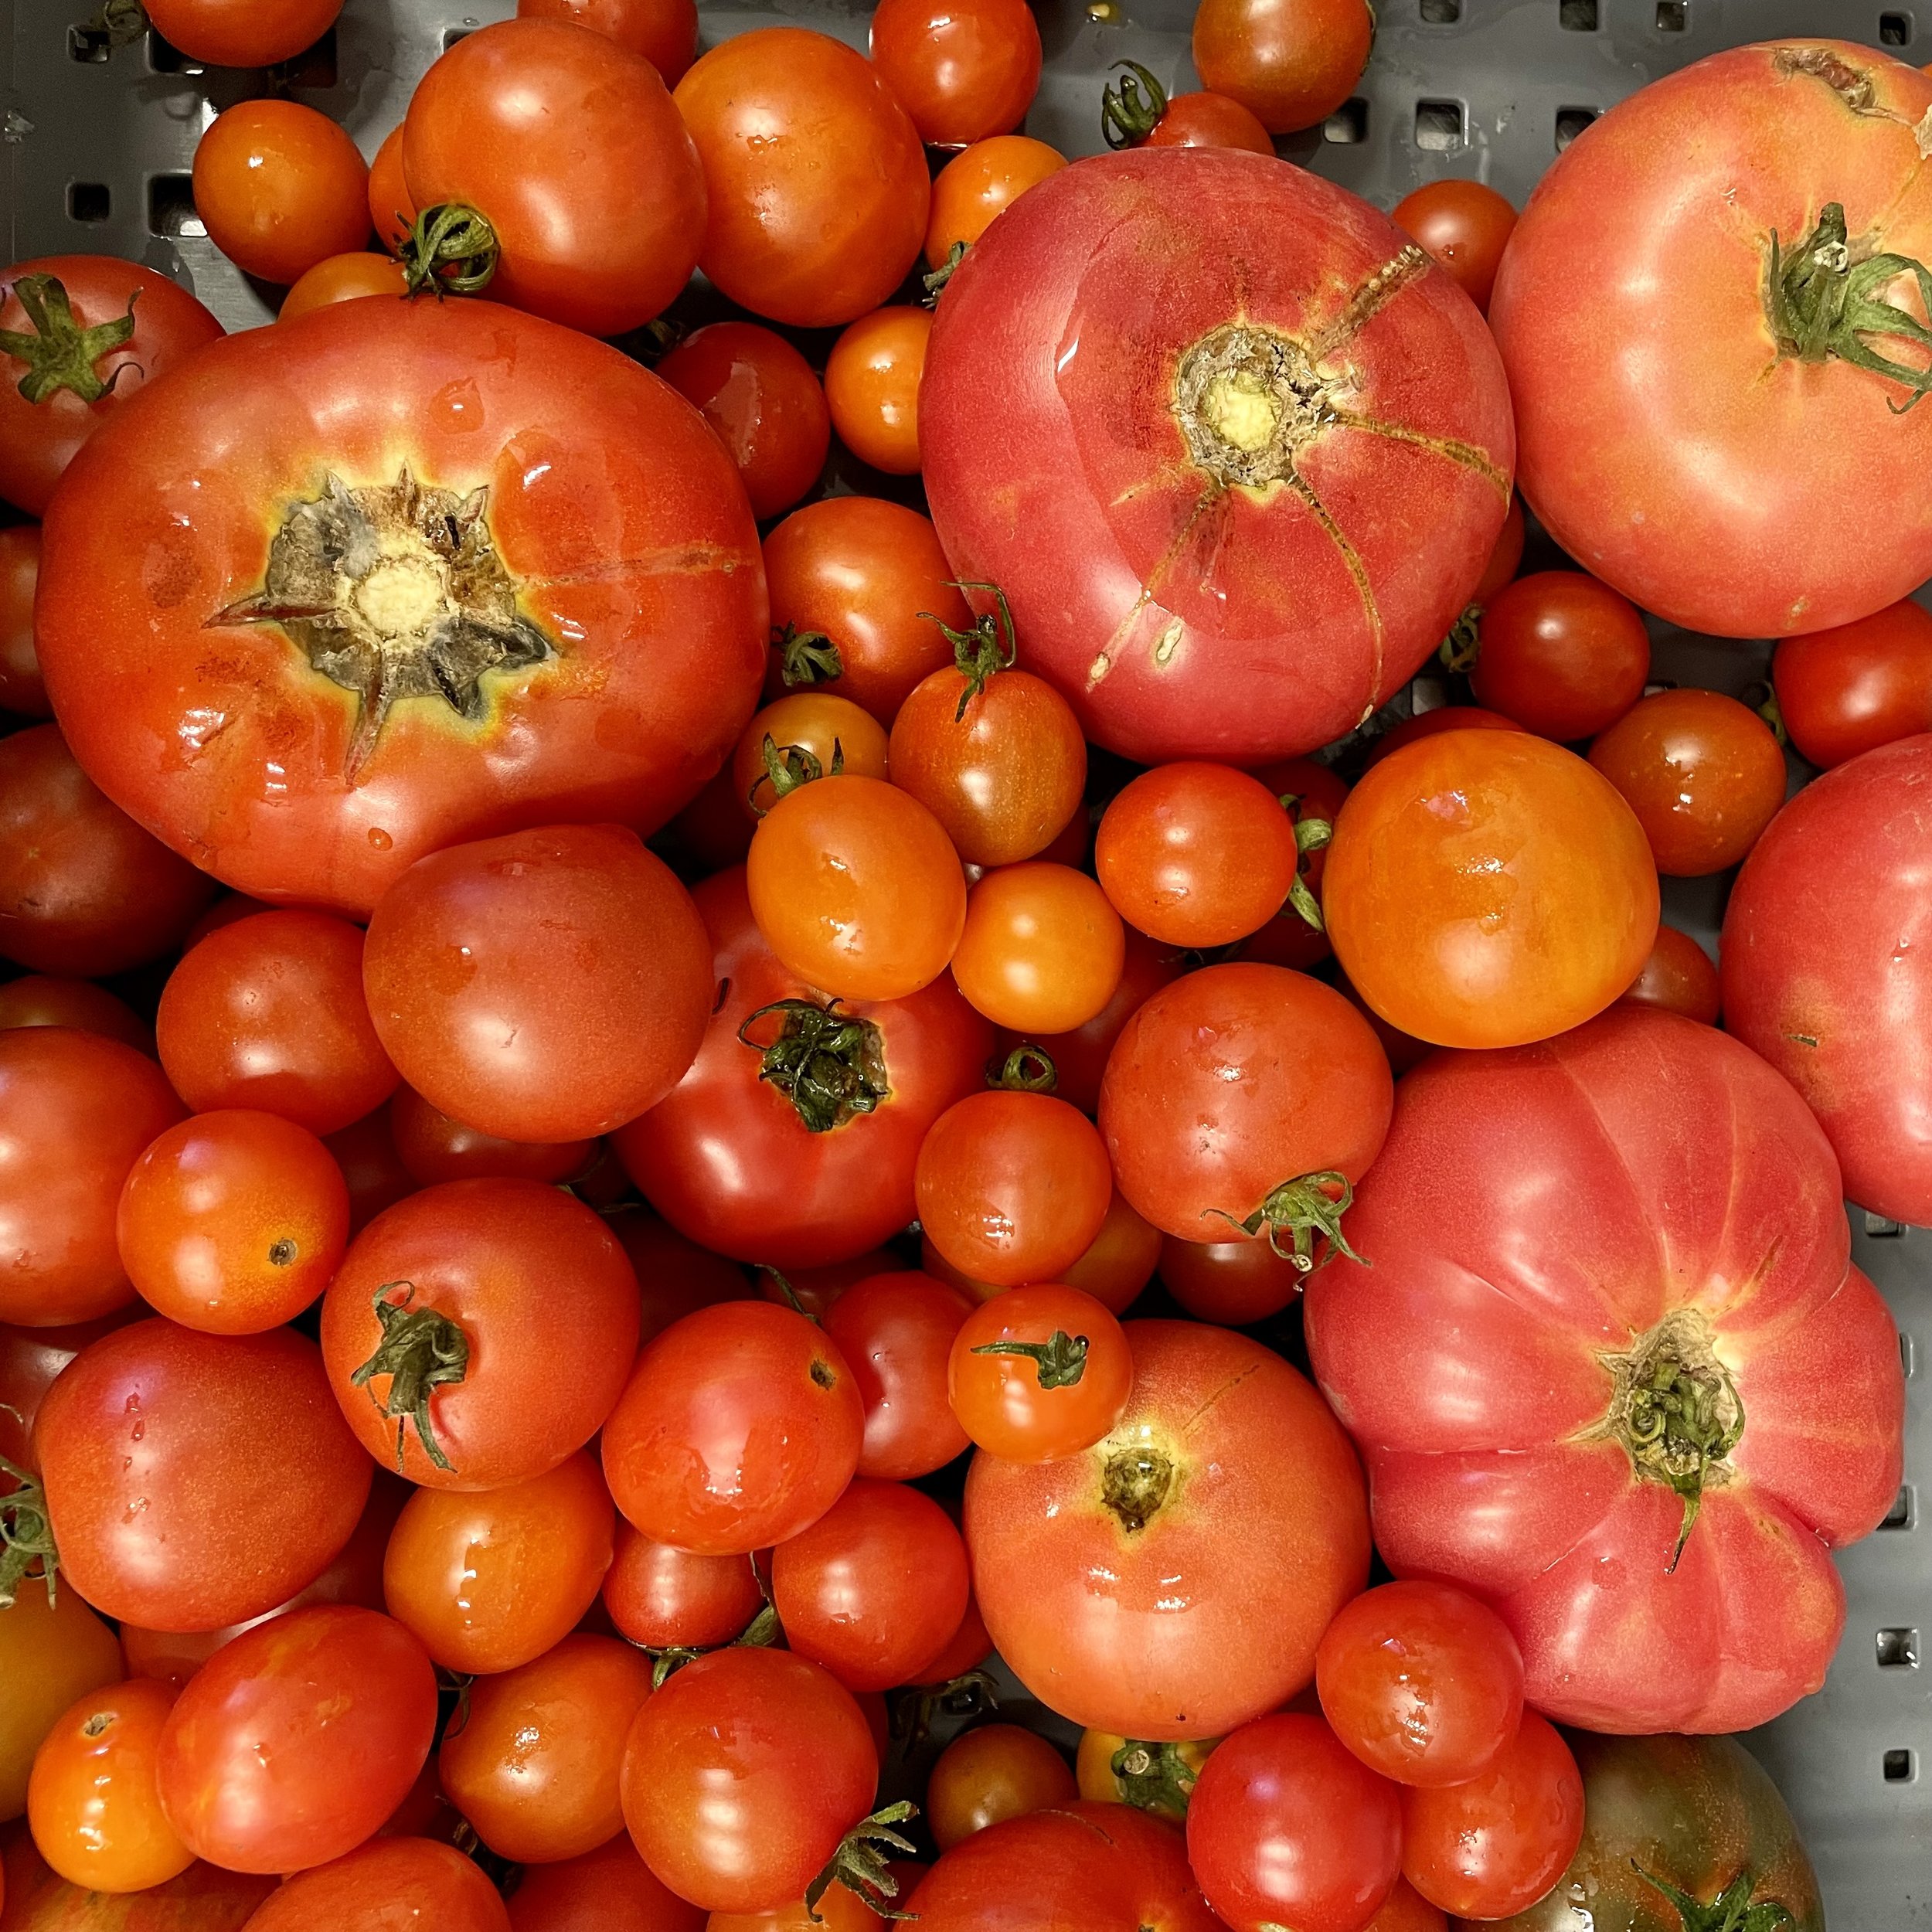
August means an inundation of tomatoes, a true embarrassment of riches. The feral, skyward sprawl of tomato plants begin to sag and snap under the weight of dozens of jewel-like tomatoes each bearing an incomparable fragrance and sweetness. The gardener vacillates between ecstasy and dismay at this boundless harvest. Here’s a modern take on a classic sauce to help you get through all those tomatoes.

Pasta al Pomodoro is a quintessential Italian dish—simply pasta with a rustic, chunky sauce of tomatoes, garlic, basil, and olive oil. This “2.0” version from EXAU Olive Oil takes one simple cue from modern gastronomy to create a phenomenal dish. By blending the sauce and utilizing the natural pectic in tomatoes, a rich emulsion is formed, creating a silky sauce that is the very flavor of summer.

This recipe is the time to show off simple ingredients of exquisite quality, and you can find them all with the exception of the basil in our shop. We have gorgeous, ruby-like cherry tomatoes and heads of fresh garlic. Our impressive array of olive oils are right alongside them, and an honest wedge of Cravero Parmigiano Reggiano is waiting for you in the cheese case.

6 tbsp extra virgin olive oil

1-2 garlic cloves smashed

1 peperoncino or small red chili pepper (fresh or dried) (We sell garlands of dried Calabrian peperoncini)

5 leaves of basil

1 lb cherry tomatoes, the sweeter the better

1 lb pasta, preferably a long noodle like spaghetti or Makaira Chittara

4 tbsp Georgio Cravero Parmigiano Reggiano, grated

  1. Bring a large pot of abundantly salted water to a boil. 

  2. Quarter the cherry tomatoes.

  3. In a small sauce pot, add the garlic and peperoncino. Cover with the olive oil and set it on low heat. If using dried peperoncino, add it with the tomatoes to insure it doesn’t burn. Cook until the garlic turns fragrant and golden, usually 2 to 3 minutes.

  4. Add the cherry tomatoes to the pot and raise the heat to medium. Stir and cover. Cook for 18 minutes, stirring every few minutes.

  5. Add the basil and a pinch of salt. Cook for another 2 minutes. Cut the heat.

  6. In a blender or using an immersion blender, puree the sauce into a velvety consistency, think Campell’s tomato soup.

  7. Cook the pasta 2 to 3 minutes shy of the manufacturer’s recommendation for al dente.

  8. Add the sauce to a large pan over low heat. Transfer the pasta to the pan with the sauce along with a ladle of the starchy pasta water. Raise the heat to medium-high and toss the pasta continuously.

  9. Remove from the heat and add the Parmigiano Reggiano. Stir to combine and serve immediately, finishing with a thread of extra virgin olive oil.

Ratatouille with Creamy Polenta

by Anna Glassman-Kaufman

No doubt you’ve seen the EXCELLENT movie, Ratatouille, about a little rat in Paris who just wanted to cook. The movie ends with beautiful plate of, you guessed it, ratatouille. If you haven’t seen the movie, go watch it tonight. You’re never too old for Pixar. And speaking of Ratatouille, August is peak ratatouille season. The most beautiful and flavorful tomatoes, eggplants, peppers and zucchini are ripening and abundantly available at local markets, and this epic French dish ties them all together perfectly.

There are two ways to make ratatouille: you can cook the vegetables separately, then together, to form a cohesive sauce. OR, you can beautifully slice each of the vegetables, and arrange them in a baking dish over a light tomato-pepper sauce, alternating slices for a show-stopping look, then bake. And when do we ever take the easy way out? We’re going for a showstopper! Don’t be intimidated, though, it’s truly an easy dish that lets the ingredients shine, and is great to make in advance if you’re hosting a crowd for dinner. Ratatouille can be served right out of the oven or at room temperature.

Now for the polenta, one of my favorite Italian foods. Polenta is a cornmeal porridge from the north of Italy, up in the Alps. One of the most memorable meals of my life was at a trattoria in a tiny Alpine town of Alagna Valsesia, where after some of the best charcuterie I’ve tried, and of course a lot of red wine, our main course consisted of a huge pot of the cheesiest polenta I’ve ever seen, placed in the middle of the table to be served family style. The simplicity of the dish, paired with the insane mountain views to our side, made for the perfect evening. Though that polenta was served on its own, polenta (or cheesy polenta!) is often topped with various meat and vegetable stews, and polenta is the perfect base for ratatouille because the porridge soaks up the sauce and provides a little more substance to the meal, without overpowering the flavors that the vegetables bring to the dish. I used Brabander cheese in my polenta. Brabander is a goat’s milk gouda made by Fromagerie L’amuse. The cheese melts beautifully and offers a light nutty flavor and richness to the polenta, without overpowering any of the other flavors in the dish. We also just got in some new Caciocavallo cheese from Puglia, Italy. Caciocavallo is similar to provolone and would also melt beautifully into polenta, for a slightly milder flavor.

Last note before we start: this dish gives you the perfect opportunity to go to your local farmers market this weekend! Minnesota farms grow some of the best produce around, and there’s nothing more therapeutic than a morning spent at the farmers market, admiring the buckets of cucumbers, bouquets of squash blossoms, and bundles of bok choy that line the tents. A few market recs: St. Paul Farmer’s Market (Sat & Sun, 7am-1pm) is hyper local, requiring that every vendor grow and process their products within 100 miles of the market. And for a smaller neighborhood market, Kingfield Market (Sundays, 8:30am-1pm) offers a unique selection of produce, honey, and crafts.

INGREDIENTS:

Vegetables:

1 zucchini, sliced in ⅛ inch rounds

1 yellow squash, sliced in ⅛ inch rounds

2 Italian eggplants - smaller, thinner eggplants are best here, sliced in ⅛ inch rounds

4 ripe roma tomatoes, sliced in ⅛ inch rounds

2 tablespoons EVOO

1 large bunch of basil

Sauce:

2 tablespoons EVOO

1 small yellow onion, diced

1 red bell pepper, diced

4 cloves of garlic, diced

2 pints cherry tomatoes, sliced in half (I’m using Sungold, any variety will work well)

½ cup dry white wine (Pinot Grigio works well)

Salt and pepper to taste

Polenta:

1 cup polenta (coarse cornmeal)

5 cups water

1 cup whole milk (some people use all water, some all milk. I think this ratio gives it a nice richness, while keeping a dish light and elegant)

¼ lb grated cheese (we recommend the Brabander for a melty, flavorful cheese that’s not too overpowering. Caciocavallo would work beautifully here too!)

4 tbsp unsalted butter

4 tsp salt

Black pepper to taste

DIRECTIONS:

Preheat oven to 375 degrees.

Lay out your sliced zucchini, yellow squash, and eggplant on a sheet pan and lightly salt each side. This will bring out the moisture in the vegetables. Let rest about 10 minutes, then dab dry with a towel.

Heat 2 tablespoons of olive oil in a small saucepan over medium heat until shimmering. Add onions and peppers. Cover until the vegetables begin to sweat, and cook on low heat until soft. Then add garlic, salt and pepper. After about 30 seconds, add the cherry tomatoes, Cook, stirring regularly for 2-3 minutes, then add the white wine, turn heat to simmer, and cover for 5-10 minutes. Lastly, remove the lid, turn heat to medium, and cook the sauce to evaporate some of the wine and thicken. Using the back of a wooden spoon, lightly smash the vegetables against the side of the pot to bring the sauce together, but leave some chunks for texture.

When your sauce is finished, pour It into the bottom of a 9x13 baking pan. Start to line up your vegetables atop your sauce, alternating zucchini, squash, eggplant, tomato, and basil leaves until the pan is filled. Cover with tin foil and bake about 45 minutes, then remove foil and continue to cook for another 30-40 minutes until some of the excess liquid cooks off.

When you take off the foil, it’s time to start the polenta. Bring your water and milk to a boil over high heat in a large pot. Reduce heat to medium. Gradually, begin to add in the polenta, whisking constantly. Once you’ve added all of the polenta, reduce heat to simmer, cover the pan and cook, continuing to whisk every 5-10 minutes for about 30 minutes, until the polenta is thickened. Remove from the heat and add the grated cheese, salt, and butter. Whisk to combine. Serve immediately, topped with the ratatouille, or if your timing is off/you’re cooking in advance, you can always leave the pot covered and reheat with a little bit more milk to loosen.

Cook Like a Monger: Pasta alla Norma!

by Austin Coe Butler

In 1831 Vincenzo Bellini wrote an opera called Norma, and the name became synonymous with a masterpiece. This dish is called Norma because it’s awesome. An earlier version of pasta alla Norma was called pasta con la melanzane (pasta with eggplant) and was immensely popular in Sicily, particularly in the city of Catania. In honor of Bellini, a native of Catania, the dish was renamed. According to legend, Nino Martoglio, a prominent Sicilian writer, exclaimed while eating this dish, “chista è ‘na vera Norma! (this is a real ‘Norma!’)” 

Norma is the perfect summer dish, evoking the fragrance, freshness, and flavors of the season. The base of the dish revolves around lightly fried eggplants in a fresh tomato sauce—two vegetables that are stubbornly only good for the few fleeting months of the sundrenched summer. If you garden or visit the farmer’s markets, July is the month our first big crop comes in, and the markets finally fill with produce. I have some dark, slender Japanese eggplants and gem-like fairytale eggplants that I harvested and used in this dish. My basil persists on flowering this time of year, so I’m happy to prune it for the sake of this dish.

If you don’t want to fry the eggplant, you can simply cut them in half, place them cut side down on a baking sheet, and place them under the broiler till the skins darken and the flesh steams itself and softens. Scoop the flesh out and add it to the tomato sauce with the wine. 

If you know someone who insists they don’t like eggplant, make this dish for them. They just might exclaim that it is “Norma!”

Ingredients:

1 pack or 500 g of dried pasta, preferably a tubular shape like rigatoni

1 punnet of cherry tomatoes, quartered

2 eggplants, cut into half inch cubes

3 garlic cloves, minced

2 stalks of basil

1 cup of dry white wine, like Sicilian Grillo or Pinot Grigio

Pecorino Romano or Ricotta Salata

EVOO

Oil for frying (I prefer sunflower oil)

  1. Bring a large pot of abundantly salted water to a boil.

  2. Fry the eggplant in your oil of choice at 390º F for 3 to 4 minutes until lightly golden brown. Remove from the oil and drain on a plate lined with paper towels. Sprinkle the hot eggplant with salt. Cooked this way, the eggplant has a delicate crispness and delectable creaminess and sweetness. I personally like frying in a wok, as the convex shape of the pan allows you to fry more in less oil.

  3. Set a saucier or saucepan over medium heat. Add enough EVOO to cover the bottom of the pan, about four tablespoons or more. Once shimmering, add the garlic and fry until fragrant, about 30 seconds. Add the tomatoes and a two-finger pinch of salt. Cover and stir occasionally. The juice from the tomatoes and olive oil will turn opaque, almost creamy. Add one stalk of the basil, whole or with the leaves torn, along with half the fried eggplant and the wine. Simmer for a few more minutes for the wine to reduce.

  4. Cook the pasta. Two minutes before al dente, transfer the pasta to the saucepan along with a ladle of the pasta water. Toss to combine (SPADELLARE!!) until the pasta is cooked through and married with the sauce. Serve immediately on a warm plate and top with the remaining eggplant, a grating of Pecorino Romano, fresh basil torn over it, and a crack of black pepper. Buon appetito!

Cook Like a Monger: Beet Spaghetti

by Austin Coe Butler

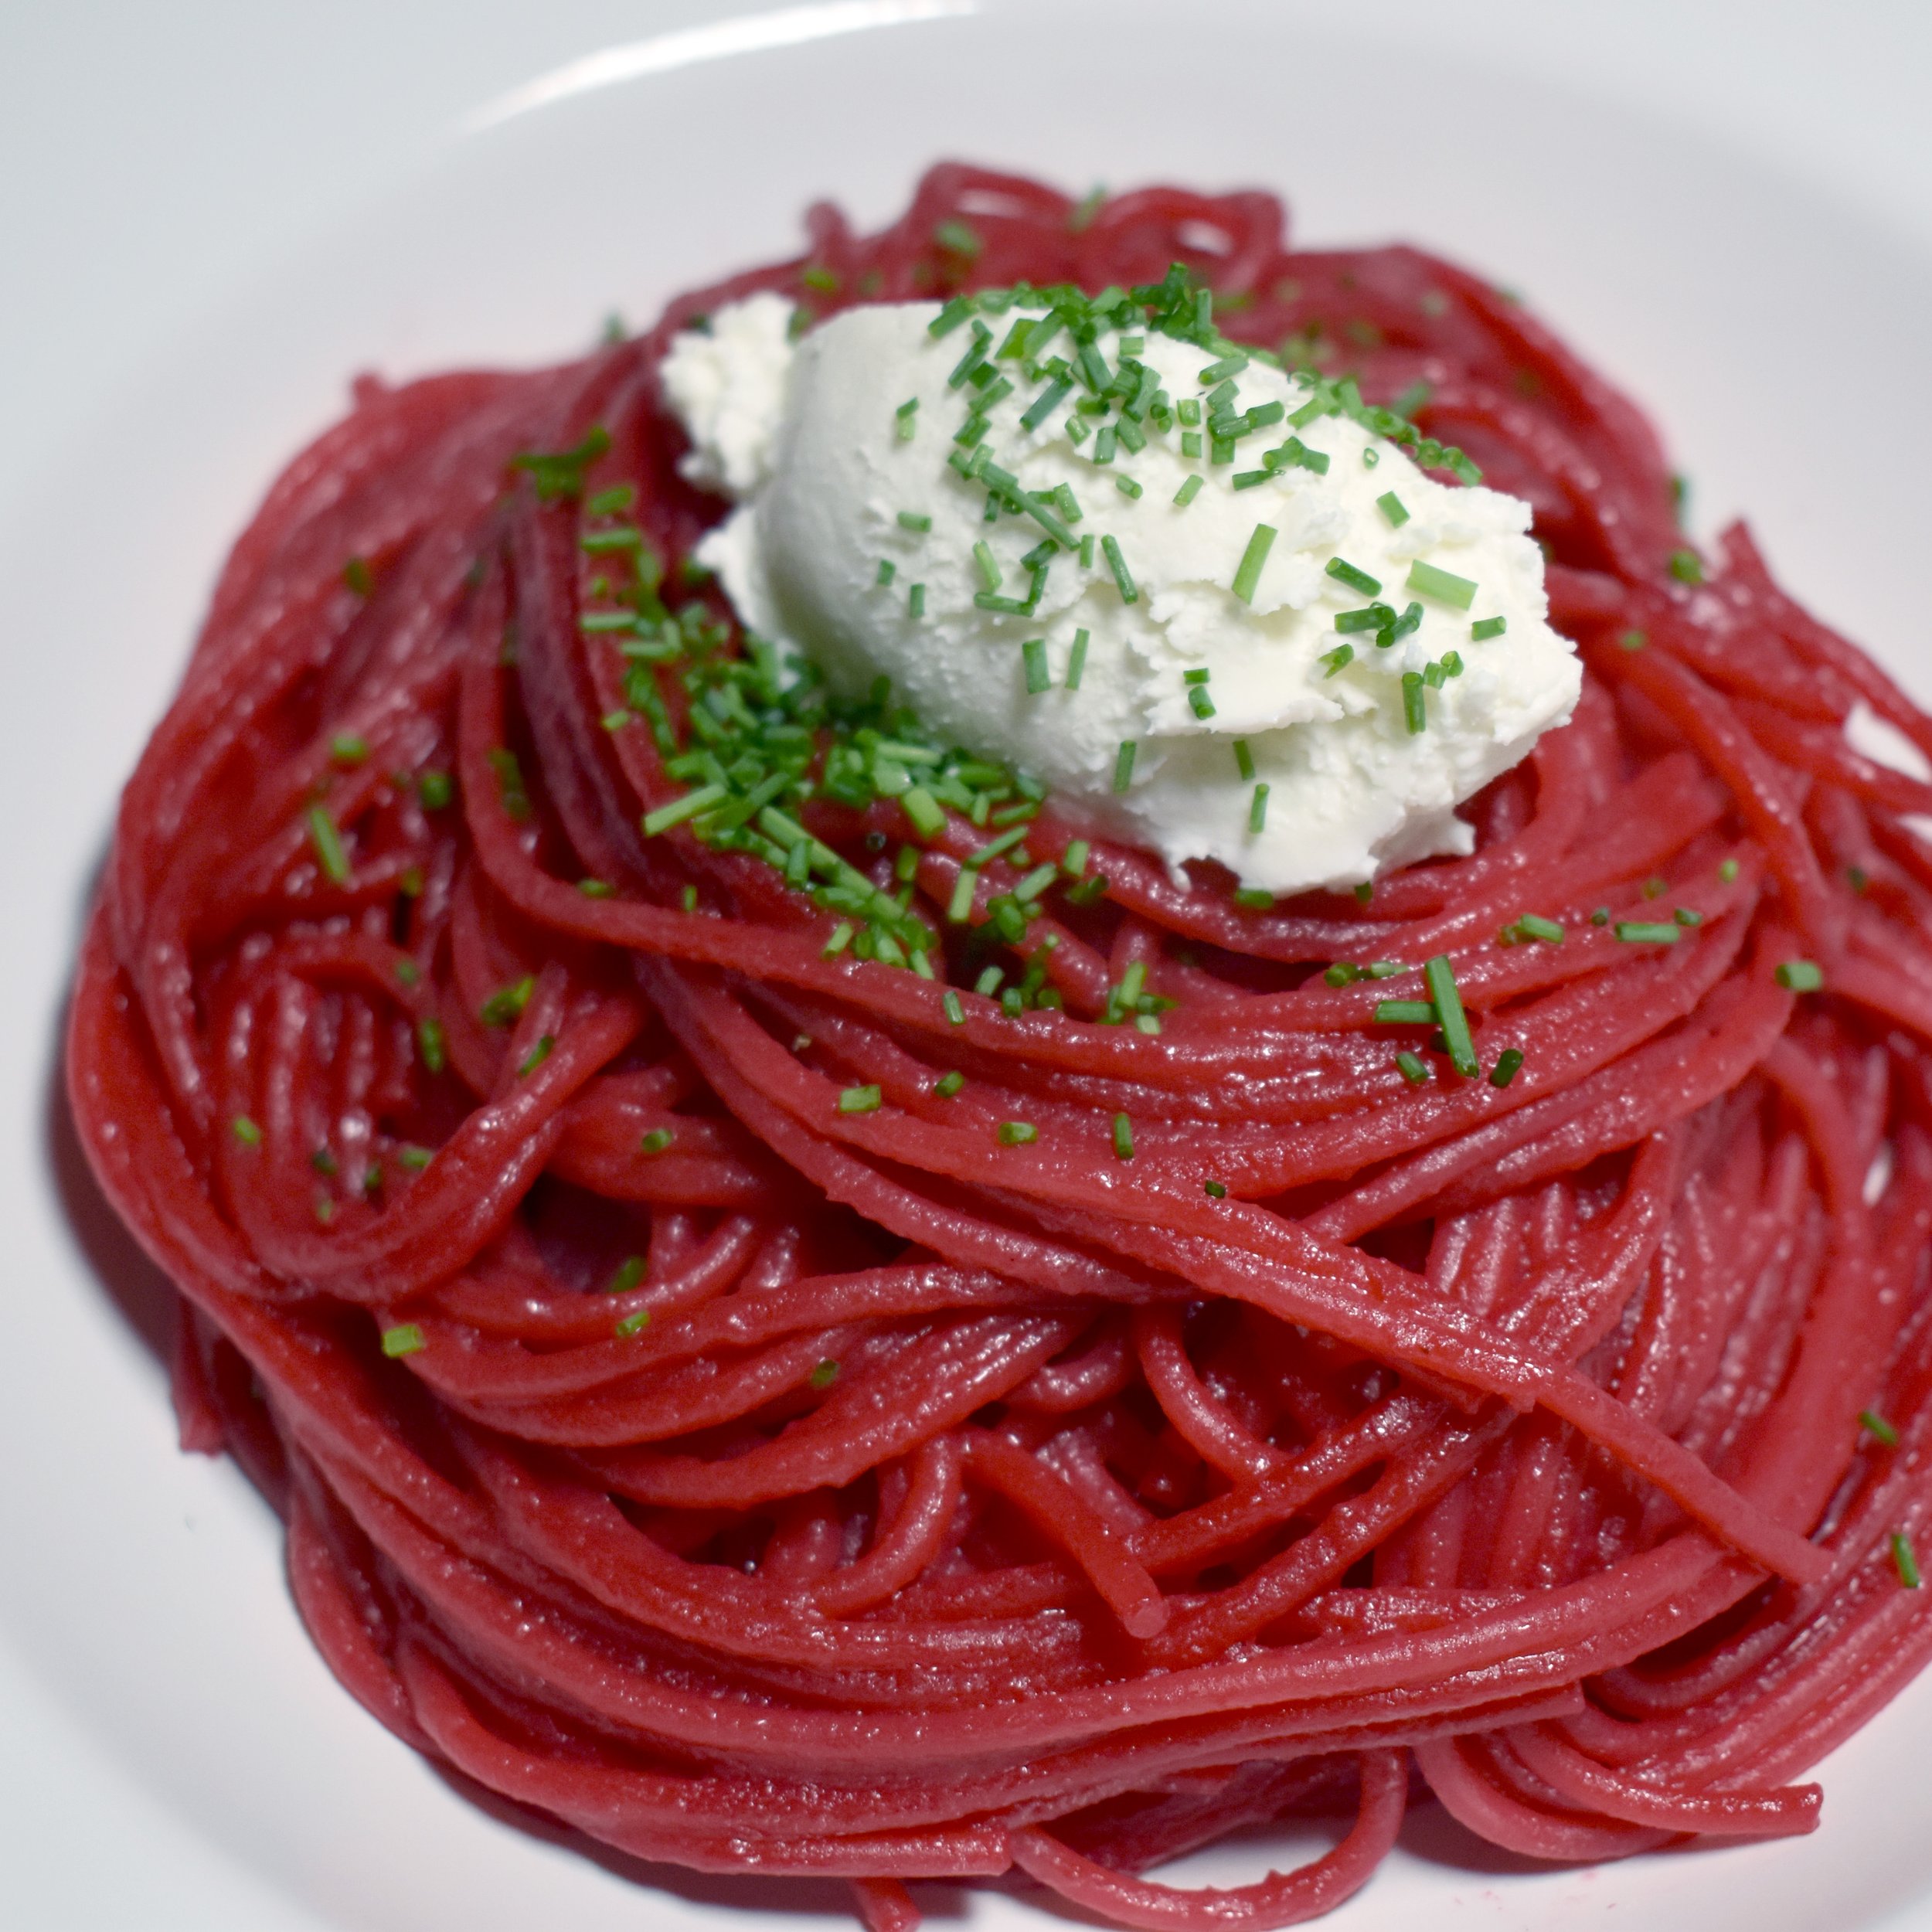
The simplicity and flavor of this dish is rivaled only by its immediate visual appeal. Just be sure to wear an apron when making it! It is inspired by a pasta dish created by Avner Lavi at Cento Pasta Bar in Los Angeles. Originally, this dish is made with poppy seeds and ricotta, but over the years I’ve found I prefer to leave the poppy seeds out as I don’t have them around the house and substitute chèvre for ricotta as chèvre and beets are a natural pairing. The sweetness and earthiness of the beet purée is balanced by the acidity of the chèvre and the freshness of the chives, all rounded out with a pleasant, toasty backbone of browned butter.

Serves 2

250 g or 1/2 package of Ma’kaira Chitarra or long pasta like spaghetti

Blakesville Creamery Fresh Chèvre

1 medium red beet

Chives 

Extra Virgin Olive Oil

3 tablespoons butter

Salt and pepper

Roast the beets. Preheat your oven to 400º F. I use this opportunity to roast a whole bunch of beets, as they’re great to have in the kitchen. Top and tail the beets, leaving the skins on. Coat the beets in olive oil and a sprinkle of salt, then wrap each tightly in aluminum foil. Place them on a rimmed baking sheet and cook. Depending on their size, this can take 40 to 60 minutes. Check on them every 20 minutes for doneness, when a knife can go through the beets with little resistance.

Make the beet purée. Once cool to handle, reserve all the beets except one. The wrapped beets can last at least a week in the fridge. Peel the beet. The skin can be removed easily with your fingers or a paper towel. Cube it and place it in a blender. Add a generous pinch of salt, about a teaspoon, and a splash of water before blending for one minute until smooth.

Brown the butter. Brown 3 tablespoons of butter over low to medium heat for about 5 minutes. The butter will pass from a milky yellow color that foams and spits to a clear brown. The milk solids in the butter will caramelize and the butter will take on a pleasant, nutty aroma. 

Finish the sauce. Add the beet purée to the brown butter and stir to combine.

Cook the pasta. Bring a large pot of well salted water to a boil. Cook the pasta two minutes shy of al dente according to the package instructions. Remove the pasta and add it to the saucepan along with a ladle of the pasta cooking water. Toss to combine and finish cooking.

Garnish. Serve the pasta in a tight bird’s nest by using tongs and a soup ladle. Garnish with a spoonful of chèvre and top with a generous amount of finely sliced chives. Serve immediately.

Cook Like a Monger: Savory Scones

by Anna Glassman-Kaufman

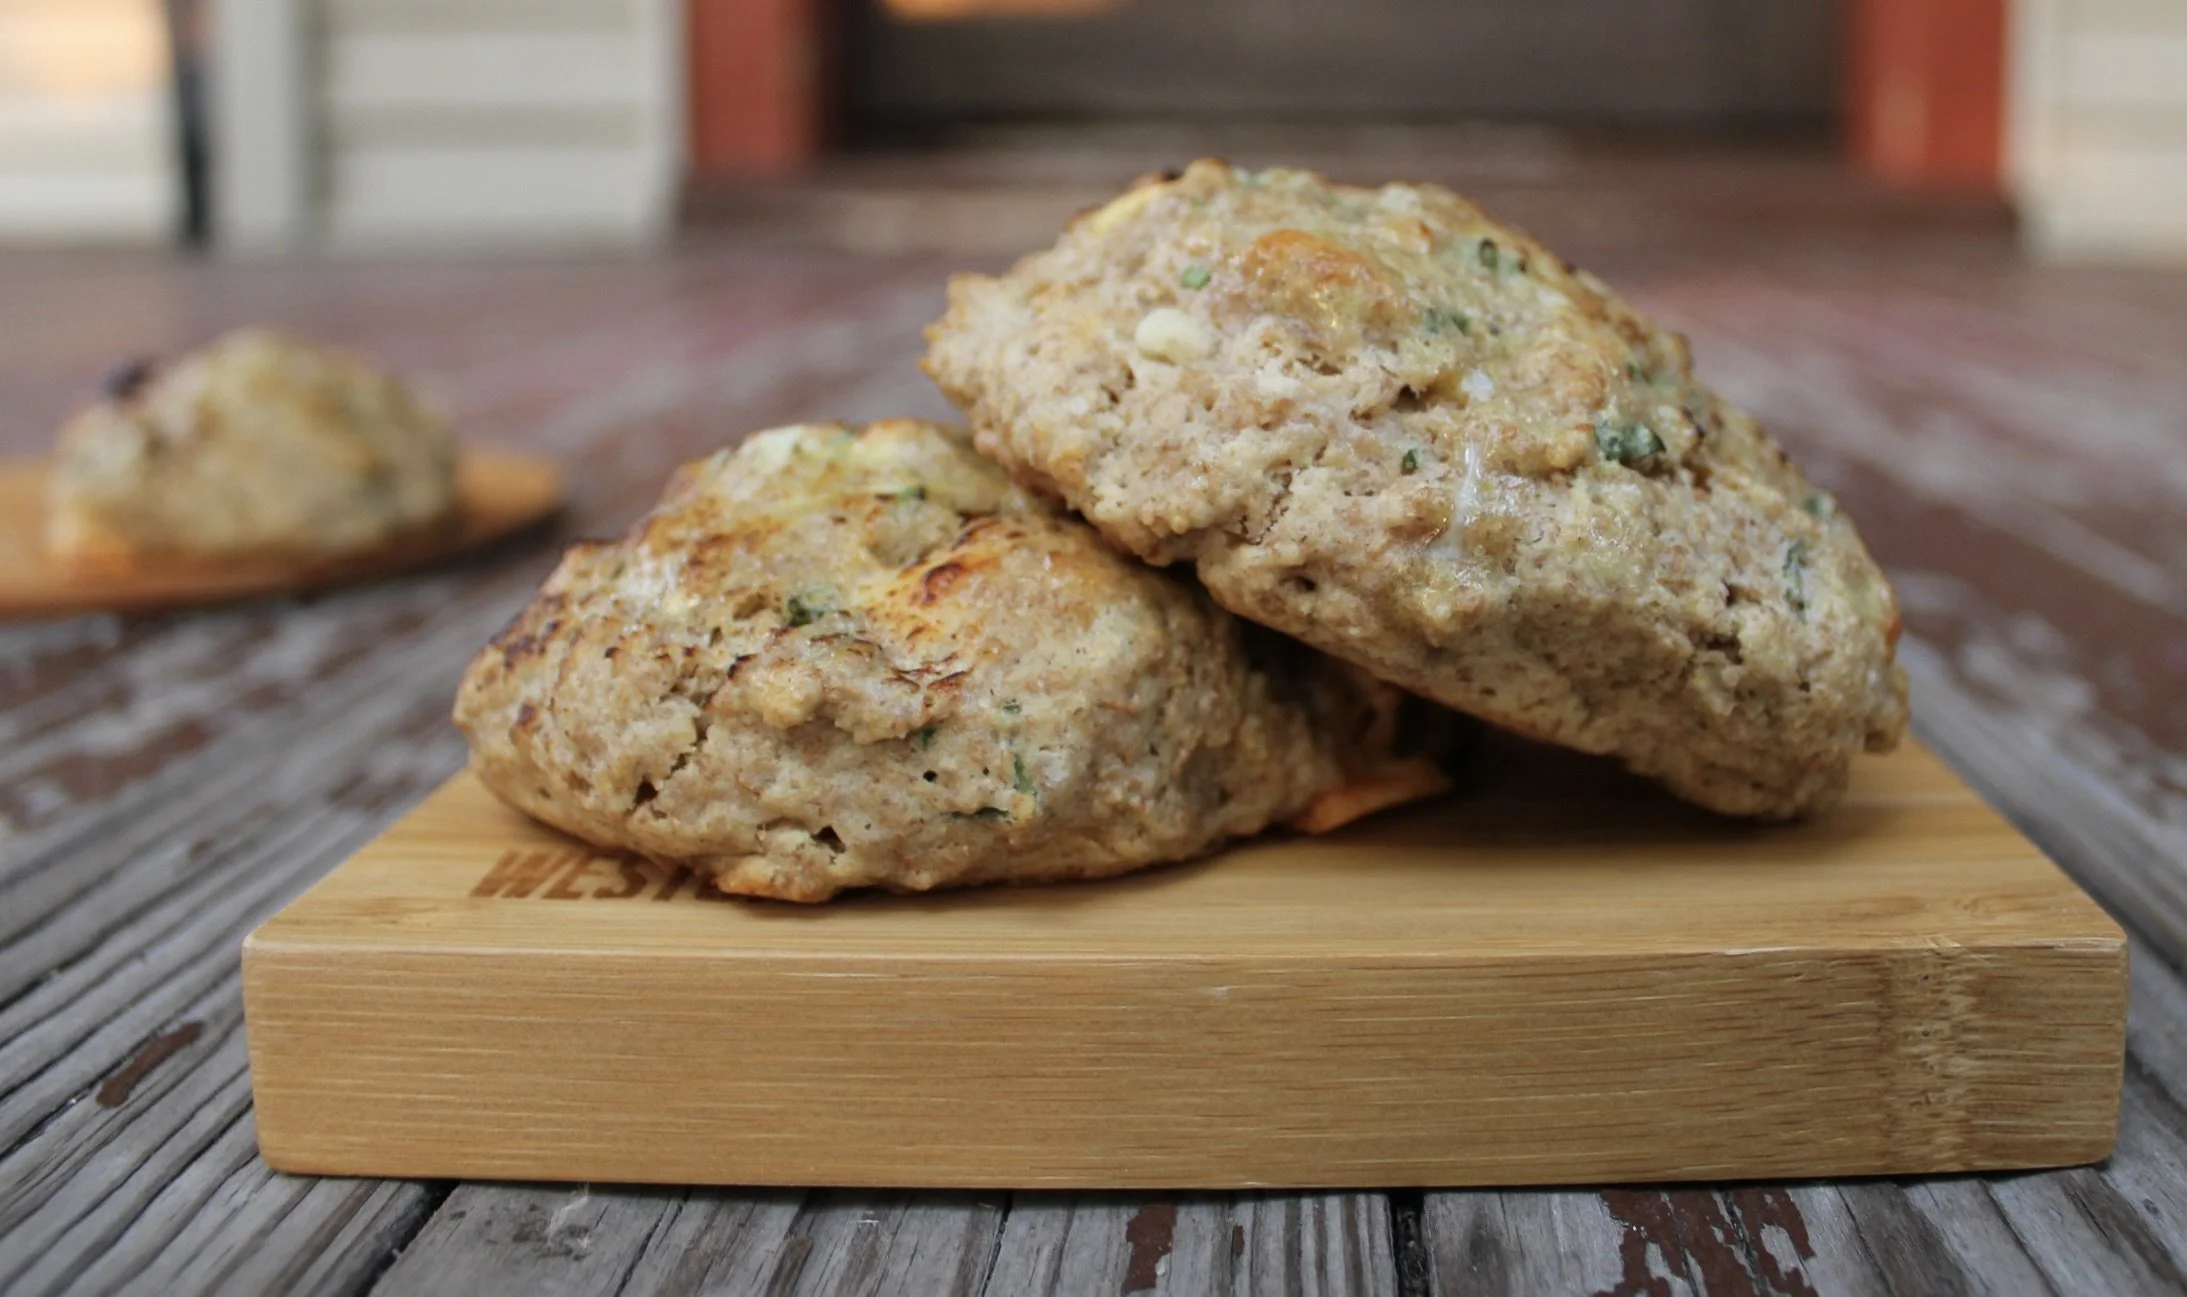
Two scones on a wooden board

We’re back with another baked good this week. These savory scones are the perfect last minute addition to any summer brunch. They come together in about 45 minutes and are a great way to use up any cheese or greens you have in the fridge.

A couple of notes:

Cheese - I love to use something soft and creamy with a little bit of funk, like anything from Alemar Cheese (local!), but any flavorful cheddar or gruyere works well in these as well! Most importantly, you just want a cheese with lots of interesting flavor that will come through in every bite. You don’t want the cheese to get lost behind the herbs. If you go with something softer, be careful to mix the cheese in last and JUST until combined, to keep the chunks of cheese intact. If you go with an aged cheese of any kind, shred the cheese or cut into ¼ inch cubes.  Today, I’m using Bleu Mont Cheddar which is earthy, nutty, and pairs well with the chives in the scone.

Flour - I love to use at least 20% whole wheat flour in anything I bake. Flour is not just an ingredient to hold the rest together, it can add its own depth of flavor and texture, and I want to celebrate it. So we’re using 50% whole wheat flour in these scones. The other half is All-Purpose, and if that’s all you have on hand, certainly feel free to go 100% AP. You just may want to cut back the buttermilk by a tablespoon or two if skipping the whole wheat, as the whole wheat flour tends to absorb a bit more liquid than sifted flour.

Yield: 8-10 scones

Ingredients:

1 Cup All-Purpose Flour

1 Cup Whole Wheat Flour

½ Tsp Baking Soda

½ Tsp Baking Powder

½ Tsp Salt

2 Tbsp Sugar

6 Tbsp Salted Butter, COLD and cubed into ½ inch pieces

½ Cup + 2 Tbsp Buttermilk

1 Egg

3 Tbsp Green Onion or Chive, minced

6 oz cheese, cubed or shredded

2 Tbsp Milk


1. Combine all dry ingredients in a mixing bowl.

2. Add the chunks of cold butter and use your fingers or a dough cutter to cut the butter into the dough, until you have a course meal with some pea sized chunks of butter.

3. Add in your egg, buttermilk herbs and cheese chunks and mix with your hands until the dough just holds together.

4. Wrap in plastic and rest for 5-10 minutes. Meanwhile, preheat your oven to 400 degrees and line a baking sheet with parchment paper.

5. Drop the dough into 8 equal sized scones. They do not have to be rounded, the uneven edges will give you a crispy exterior when baked.

6. Brush each scone with a little bit of milk and sprinkle with flaky salt.

7. Bake in 400 degree oven for 15-18 minutes until the exterior is golden brown and a toothpick comes out clean.

8. Enjoy while still warm with little bit of extra salted butter!

Cook Like a Monger: Whipped Feta with Chili Crisp & Fried Zucchini

by Anna Glassman-Kaufman


We all know chili crisp is having a moment, and we’ve written about it on this blog before, so I won’t write too much here, but know that the Kari Kari Chili Crisp is the thing you’ve been missing in your kitchen. It makes any mediocre dinner an excellent one, adding not only a bit of heat but also garlicky umami goodness. There’s really no going wrong with this stuff.

Now we bring in the feta. Feta is a sheep’s milk cheese originating in Greece. The curd is salted and dry aged for a brief period before aging in brine, a very salty water solution. It’s highly acidic, so it doesn’t melt as well as other cheeses and is most often served cold or room temperature. But when blended with a bit of brine, feta turns into a silky smooth dip that is the perfect base for any toppings that inspire you, and that’s what we’re doing today.

Alright one final component: the zucchini. I don’t know about you, but my zucchini plants go absolutely crazy sometime around mid-summer and produce more than I could ever imagine eating. So I’m always looking for new ways to use them up because let’s be real, it’s not always the most exciting and flavorful veggie, especially after you accidentally let it grow a day too long and it’s the size of your arm. But if you watched Stanley Tucci’s “Searching for Italy”, you will surely remember the Spaghetti all Nerano he ate in the Calabria episode. The zucchini were sliced thinly and twice fried to bring out all of the sweetness and flavor they have to offer, and that’s what we’re emulating in this recipe. I don’t quite go so far as to deep fry them, but I’ve found that slicing zucchini thinly and shallow frying in olive oil can achieve a texture reminiscent of the one I imagine in this epic pasta dish, and certainly makes them taste delicious.


8 oz Essex Sheep’s Milk Feta

2 tbsp Feta Brine

Zest of One Lemon

1 Medium Zucchini, thinly sliced, lengthwise

1 tbsp Kosher Salt

¼ cup Extra Virgin Olive Oil

1 tbsp Kari Kari Chili Crisp

1 tbsp Basil Leaves, julienned

Thinly Sliced and Toasted Bread to dip - I’m using Baker’s Field Table Bread of course


Lay zucchini slices down on a baking pan and salt the surfaces with the 1 tbsp kosher salt. This helps pull excess moisture out of the zucchini. Set aside for 10 minutes.

Meanwhile, blend feta, lemon zest, and brine in a food processor about 3-5 minutes until silky smooth. If it still feels a bit too stiff, add another tablespoon of brine to smooth it out. Spoon the whipped feta onto your serving dish and smooth out surface, creating a shallow well in the center. Refrigerate until ready to assemble and serve.

Use a towel to pat the zucchini dry.

Heat up a sauté pan over medium heat and add ¼ cup olive oil. Wait another minute until the oil is sufficiently hot and begin adding zucchini slices. You will likely need to fry them in several batches. Fry for a couple minutes on each side, until lightly browned and crisp, but not burnt. Then transfer to a clean plate, lightly salt and pepper, and move on to the next round.

When you’ve finished frying and your zucchini has fully cooled, top the plated whipped feta with the zucchini and spoon a tablespoon of Kari Kari Chili Crisp over the top. Lastly, garnish with the julienned basil.

Serve with toasted bread and enjoy!


P.S. for the iconic Spaghetti alla Nerano recipe, look here!

Cook Like a Cheesemonger: Panzanella Pasta Salad

By Austin Coe Butler

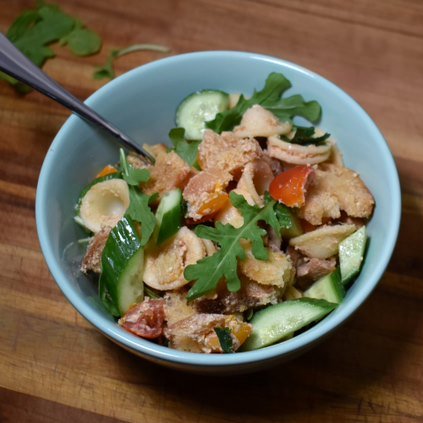
This hybrid between a creamy pasta salad and a panzanella, a bread and tomato salad with a tangy vinaigrette, is the perfect dish to bring to your next cookout, picnic, potluck, or block party. It’s bright, creamy, tangy, refreshing, and, best of all, will guarantee you leave with a nice empty bowl that’s easy to clean. It’s best made in advance, great at room temperature, easy to scale up, and simple to modify for the occasion. 

I want to thank the customer that shared with me the inspiration for this recipe. (You know who you are!) Last weekend we featured our custom washed Grillin’ Cheese from Blakesville Creamery that is washed in Dampfwerk’s Barrel Aged Gin. It’s a Croatian inspired cheese that is essentially a puck of chèvre wrapped in grape leaves that have been soaked in a spirit. This cheese is a favorite of this customer’s daughters, and it’s always a joy when I see them picking it up. While we were talking at the cheese counter he mentioned that he had substituted the Blakesville Grillin’ Cheese for halloumi in a New York Times recipe by Yossey Arefi for orecchiette salad with halloumi croutons. In addition, he had removed the cilantro, red onions, and arugula, and added in bread croutons. The judgment of his daughters? This version was even better! And it was even better the next day! This is how great recipes are born.

1 pt cherry tomatoes, quartered

4 tablespoons extra virgin olive oil

2 tablespoons red wine vinegar like La Guinelle Vinaigre de Banyuls

Kosher salt

Black pepper 

8 ounces orecchiette or other small pasta

1 Blakesville X Dampfwerk Grillin’ Cheese

1 bag France 44 garlic crostini

3 Persian cucumbers or 1 English cucumber deseeded

2 cups arugula (optional)

½ cup chopped cilantro or parsley

½ cup chopped mint

¼ finely chopped red onion (optional)

  1. Add the tomatoes, 2 tablespoons of the olive oil, red wine vinegar, salt, and pepper in a small bowl and leave them to marinate while you prepare the rest of your ingredients.

  2. Bring a large pot of salted water to a boil.

  3. Grill or pan fry the cheese. Grilling the cheese is a great option because it imparts smoke to the cheese, otherwise, pan frying it works great, too. You’re looking to heat the cheese through and soften it. I did this directly over my gas burner on low heat, flipping it from time to time, for about 5 minutes, just to get some char. Once soft, remove it from the grape leaves, add it to a large bowl, and mash it into a paste.

  4.  Cook the pasta. It’s especially important with pasta salad to cook the pasta al dente, usually about 2 minutes short of the manufacturer's recommended cook time. Often the pasta in pasta salads has been obliterated—it’s soft, mushy, slimy, and disintegrates. Al dente pasta is also “thirsty” and will soak up the vinaigrette. Once cooked, strain the pasta and add it to the large bowl along with the tomato vinaigrette. Stir to combine the pasta, tomatoes, and cheese.

  5. Add all the remaining ingredients to the large bowl and stir to combine. The mixture will seem a little stiff, so feel free to add more olive oil and vinegar, but give it time to rest while the pasta and crostini absorb the liquid and soften. What’s great about the addition of the crostini is that since they are toasted, they don’t turn to mush the way fresh or even stale bread does when it soaks up liquid. Instead, it retains its shape and a bit of spring, providing a nice chew and even a bit of crunch the next day. 

  6. While this pasta salad will be ready to go as soon as you make it, I suggest letting it sit overnight. If you would like to add the arugula, add that on the day of serving so it doesn’t wilt along with a few more freshly chopped herbs and a scattering of crushed crostini for crunch.

Order Online