Sophia's "invisible" tomato sauce

‘Invisible’ Tomato Sauce 

Invisible tomato sauce is the perfect pasta pairing when you crave warm summery nights. Bursting cherry tomatoes and melting anchovies give this pasta sauce tons of flavor. It’s perfect  for actual summer nights too, since it only takes the time your pasta needs to cook. It’s fun to let the cherry tomatoes burst slowly on their own, but if you need them to hurry up a bit, you can add some pasta water to the sauté pan and cover. 

Ingredients- 

Pint Cherry tomatoes* 

Olive Oil* 

Linguine* 

2-4 anchovy filets* 

3 large garlic cloves*, chopped

Chili flakes to taste* 

Optional-

Nutritional Yeast or Parmigiano-Reggiano* 

* all available at France 44 Cheese Shop

Get you pasta water boiling on the stove. Put a high-walled sauté pan on medium heat and add a few glugs of olive oil, around 2 tbsp. Pour tomatoes into the pan and let sizzle and burst, around 10 minutes 

  1. Add your pasta to the boiling water. Once the tomatoes are ¾ of the way burst and most of the juices have started to run out, add your anchovy filets, garlic, and chili flakes. Mix so the anchovies melt, the garlic becomes fragrant, and the chili doesn’t burn. If the pan looks a little dry, add more olive oil or pasta water. 

  2. When your pasta is a minute from where you want it, pull it straight from the pot and add to the tomato sauce. Let the noodles finish cooking with the tomatoes. Stir frequently and add more pasta water as needed to emulsify. Once the sauce is shiny and clinging to the noodles, turn off the heat and plate. Taste for salt and spice.

  3. With a dish like this, I don’t always want to weigh it down with dairy. On those days, I opt for nutritional yeast, one of my favorite garnishes with a nutty, savory flavor. On a rainy day like today, I went with Parmigiano-Reggiano for that distinct Parmy comfort. 

Almost Patatas Bravas

Jared’s Almost Patatas Bravas

 Serves 3–4

 One of Spain’s most famous tapas, patatas bravas are fried potatoes typically served with garlic aioli and a warm tomato sauce spiked with pimentón de la vera, or Spanish smoked paprika. This recipe reimagines the classic dish with France 44’s Paprika Parmesan dip for a hearty, cheesy (!!!) potato appetizer.

 Here’s how we’re switching things up. Instead of aioli, we’ll use garrotxa, a floral and earthy goat cheese from the mountains north of Barcelona. And in the sauce, New York Shuk’s harissa with preserved lemon adds not only spice but also a citric tanginess that pairs nicely with the cheese. You’ll need:

 From France 44:

 ·         1 bag of potatoes (about 2#)

·         1 container F44 Paprika Parmesan dip

·         1½  T New York Shuk harissa with preserved lemon (or more to taste!)

·         2 cups chicken stock

·         ¼ lb Garrotxa cheese

 From your pantry:

 ·         1 8 oz. can tomato sauce (I also tested this recipe with 1 cup of F44’s tomato soup instead and it worked very well!)

·         Kosher salt & pepper


Instructions:


1.      Start the potatoes: Cut potatoes into wedge-shaped pieces, about 12–16 per potato depending on the size.

2.      Pour the paprika parmesan dip into a bowl. Add the potatoes and about a teaspoon each of salt and pepper, and toss to coat.

3.      In a large nonstick skillet over medium heat, fry the potatoes until they’re tender on the inside, crispy on the outside, and deeply golden-brown. When they’re done, sprinkle on a little more salt.

 4.      Meanwhile, make the bravas sauce: In a saucepan over medium-low heat, combine the tomato sauce, harissa, and chicken stock.

 5.      Simmer, stirring frequently so the bottom doesn’t burn, until the sauce is reduced to about the thickness of ketchup (the final texture will be much grainier, though). Trust me, it’ll get there.

 6.      Assemble! Arrange potatoes on a plate and top with sauce. Grate plenty of garrotxa cheese over the top and enjoy with a nice full-bodied Spanish red wine!

Jared Patatas Bravas 1.JPG
Jared Patatas Bravas 2.JPG

Erin’s Lemon Ricotta Pancakes with Blueberry Compote

Top these fluffy golden babies with a thick and sweet blueberry sauce, or your favorite maple syrup and butter. And just like that, it’s the weekend. Or maybe it’s 7 PM on a Tuesday, but honestly, no one cares when you eat pancakes. Pancakes aren’t dependent on time. Pancakes are a state of mind. 


Ingredients From France44: 

American Spoon Wheat & Malt Pancake mix 

Locally Laid Eggs 

Fresh Blueberries (as availability allows)

Runamok Elderberry Maple Syrup 

Calabro Hand Dipped Ricotta 

 Ingredients from your Pantry:

Milk

Honey

Sugar

3 Lemons  (we have some if you need them)

Vegetable oil

Salt


FOR THE COMPOTE

2 cups blueberries 

1/4 cup sugar

2 teaspoons fresh lemon juice

3 tablespoons water 

Pinch salt 


To make the compote, combine all ingredients in a small sauce pan and cook over medium heat for 8-10 minutes, stirring occasionally until thick. Keep warm while you prepare the pancakes.


FOR THE PANCAKES

4 large eggs, yolks and whites separated 

¾ cup whole milk

2 tablespoons honey

2 tablespoons vegetable oil

zest of three lemons

1¼ cups American Spoon Wheat & Malt Pancake Mix

¾ cup whole milk ricotta cheese

pinch of salt


For the pancakes combine the egg yolks, milk, honey, oil, and lemon zest in a large bowl and whisk mixture until smooth. Using a rubber spatula, fold the pancake mix into the wet ingredients. Place the egg whites and salt in a clean bowl and whip until the whites hold soft peaks. Be very careful when you separate the eggs. Any yolk (or other fat, oil, or grease) that makes its way into the whites will keep the whites from whipping up as big and fluffy as possible. 


Fold the whipped whites and the ricotta into the batter, making sure to maintain the texture of both the ricotta and the egg whites. (I believe in you)


Heat a large pan over medium-high heat. Coat the surface of the pan with a thin layer of butter. Scoop the batter onto the pan, measuring out about ¼ cup for each pancake. Cook until bubbles form on the top of each pancake, 3-4 minutes, then flip and cook on the other side until golden. 


Repeat until all the pancakes are cooked. Top with reserved blueberry compote. Add some butter because you feel like it. Maybe get a little wild and pour some Runamok Maple Syrup on top, too. Cut into those cakes and never look back. 

pancakes1.jpg
pancakes2.jpg
pancakes3.jpg

Erin's Easy Weekday Ramen

I have yet to find the wherewithal to conquer my own ramen tare (flavor base) from scratch. I don’t dream of blanching and boiling pig bones on my stove for 12-18 hours for tonkotsu broth, and since I’m fresh out of Japanese kelp, I’m not making dashi (stock) anytime soon. 

 As it stands, I don’t need to. Our cheese shop has multiple ramen bases that are honestly, pretty excellent. 

 This ramen recipe is flexible. You can add other proteins or vegetables if you’d like, and omit those that don’t appeal to you. The one thing I love about ramen is its versatility and infinitely customizable combinations to suit every season, taste, and diet.

 The ramen broth I’m using has a matsutake mushroom and shoyu (soy) base. It’s topped with crispy pork belly, jammy eggs, shiitakes, and garnishes from your pantry or fridge. 

Pork Belly and Mushroom Ramen 

(Serves 1-2)

Ingredients: 

 From France44:

Pork Belly Confit 

Professional Ramen Base (Matsutake)

Locally Laid Eggs  

From your pantry:

Scallion 

Ramen or noodles of your choice (2 packs)

Furikake, chili crisp in oil, sesame seeds/oil, or whatever seasonings you prefer. 

Mushrooms of any kind, or other vegetables (i.e. bok choy, bean sprouts, cabbage, pickled veg, etc)

Directions:

 Step 1: Crisp Pork Belly 

 This pork belly is already cooked, so all you have to do is fry the heck out of it. It’s been previously “confited” meaning it’s slow cooked in its own fat. 

 For this recipe, I recommend 2 oz. of pork belly per serving, but do as you wish. Cut your pork belly into equal slices. Each slice should be about an inch thick. 

 Use a cast iron, or a very heavy bottom skillet.  Add a teaspoon of canola oil (to prevent immediate burning) and place pork belly into pan. Cook on medium-high for a minute or two, and reduce to medium to render out the fat. 

Pan fry 4-5 minutes each side, or until it looks browned and crispy. Set aside. *Side note: fry some of your mushrooms in that pork belly fat, go on just do it okaaay* 


Step 2: Cook Jammy Eggs 

Bring a medium pot of water to a boil. Carefully add eggs one at a time and boil gently for 6-7 minutes. (Egg yolks should be shiny yellow and almost jammy; egg white should be just set.) Drain eggs and transfer to a bowl of ice water to stop cooking; let cool. Peel and set aside.

Step 3: Prep mushrooms or Vegetables 

I had some leftover shiitake mushrooms in my fridge, so I gently brushed them off and sliced them to desired size. I also thinly cut some scallion. You could use bok choy, cabbage, bean sprouts, or even pickled vegetables. Frozen corn. I’m not here to stop you. 

Step 4: Cook Noodles

 Cook noodles in a large pot of boiling water according to package directions until al dente; drain (no need to salt the water, as ramen noodles contain more salt than pasta). Do not use flavor packets. Set cooked noodles aside. 


Step 5: Heat Broth and Assemble 

When ready to serve, bring ramen broth to a simmer; it should be very hot. Just before serving, place noodles in a deep bowl, or divide into two, if sharing. Top with sliced pork belly, placing it off to the side. Slowly ladle hot broth over noodles. 

 Halve your jammy eggs, place in bowl next to pork. Place sliced scallions next to eggs. Add your mushrooms and vegetables. 

 Garnish with sesame seeds, furikake, spicy chili bean paste, or chili oil. 

Maybe you have some dried nori sheets and pickled ginger from the sushi you intended on making, but never did. No one’s judging. Slip those in there, too...   

ramen1.jpg
ramen2.jpg
ramen3.jpg

Sophia's Anchovy Toast

Anchovy Butter Toast 

This ode-to-the-anchovy toast-topper makes an excellent breakfast or hearty snack. I’ve made this several times, inspired by Sam Sifton’s Not a Recipe anchovy toast. Good butter and high-quality anchovies go a long way, but whatever you have in your pantry works. For the bones of this recipe, you’ll need anchovies, butter, and bread for toasting. Feel free to add anything else you think sounds good, like lemon juice or hot sauce for brightness. You can top your toast however you like. This time, I made one with sliced radishes and another with egg and chili flakes. You can make it in about 15 minutes in the morning (if you remember to set your butter out while making your first cup of coffee). Otherwise, the anchovy butter can be made the night before and stored in the fridge for an even easier, filling breakfast.


I want to take one moment to talk about butter. There’s a lot of good butter at France 44 and a lot of strong opinions about butter. If you’ve ever asked us about butter, someone has probably told you to get the gold foil wrapped Beurre de Baratte. For me, you can’t beat the Ploughgate Creamery Salted Cured Butter. Usually, I stay away from salted butter, but the Ploughgate Butter is the best butter I have ever had. Eat with a spoon good. If you are going for salted butter with this recipe, go for the Ploughgate which is not overwhelmingly salty. Otherwise, lean into unsalted butter. The anchovies have the salt covered.

anchovytoast1.jpg

Ingredients 

The Butter:

2-3 Ortiz anchovies in olive oil

2 oz Ploughgate Butter or unsalted butter at room temperature 

1 clove garlic, minced

Fresh lemon juice


The Toast:

Rose Street Patisserie Baguette (day or two old works great) or Baker’s Field Hundred Rye bread for a twist 

Toppings:

6 ½ minute egg

Chili flakes

Sliced Radishes 

To prepare the butter, 

  1. If topping with an egg, get a pot of water boiling on the stove.

  2. Place your softened butter in a small bowl.

  3. Mince anchovies. A smaller mince means they’ll blend more easily into the softened butter. But personally, I like a chunky anchovy moment. Add to butter.

  4. Mince garlic. Feel free to use a dash of garlic powder (or no garlic at all) if raw garlic isn’t your scene. Add this to the butter as well.

  5. Squeeze fresh lemon juice into the butter or add your hot sauce. 

  6. Using a fork, mix the anchovies, garlic, lemon juice, and butter together until well combined. This took me about a minute or two of steady mixing. 

  7. Always taste as you go to see what it needs. Acid? Black pepper? Probably not salt. Make any adjustments and set aside.

For the bread: 

  1. Slice your bread. For a baguette, I suggest a bias cut (with the knife at an angle instead of straight across). This way, you get larger pieces of toast. 

  2. Toast any way you like. I did a few minutes in the toaster, but the world is your oyster. Er, anchovy. 

For the toppings: 

  1. Your water should be boiling by now. Once it is, prep a timer for six and a half minutes. Six and a half minutes will yield a jammy, runny yolk. If you like your yolk firmer, set for a minute longer. 

  2. Using a slotted spoon, gently lower your egg into the water and start the timer. Fill a bowl with ice water and place in the sink. 

  3. Wash your radishes. Slice thinly. Set aside. 

  4. When you six and half minute timer goes off, scoop your egg out of the water with the slotted spoon and gently place it in the ice bath. Let it hang out. 

To assemble: 

  1. Place your toasted bread on a plate. Generously spread your anchovy butter on the toast. 

  2. For the radish toast, simply place the sliced radishes on the designated toast.

  3. For the egg toast, you’ll need to crack and peel your egg. Remember, a six and a half minute egg is pretty soft so you’ll need to be gentle. I like to gently crack both short ends of the egg on a hard surface and then gently roll the egg with light pressure to crack the rest of the shell. The ice water should have shocked the egg enough that the egg will peel with minimal effort. 

  4. Once peeled, slice in quarters and assemble on top of toast

The eggs are messy, just the way they should be. The radishes provide a nice textural difference. The butter should be briney, rich, and full of umami and acid. The egg toast needed some heat so I added some dried chili flakes on top. Like most good recipes, this toast is flexible and should be adapted to your preferences. Have fun!

anchovytoast2.jpg
anchovytoast3.jpg

SBL Farro-Mushroom Risotto

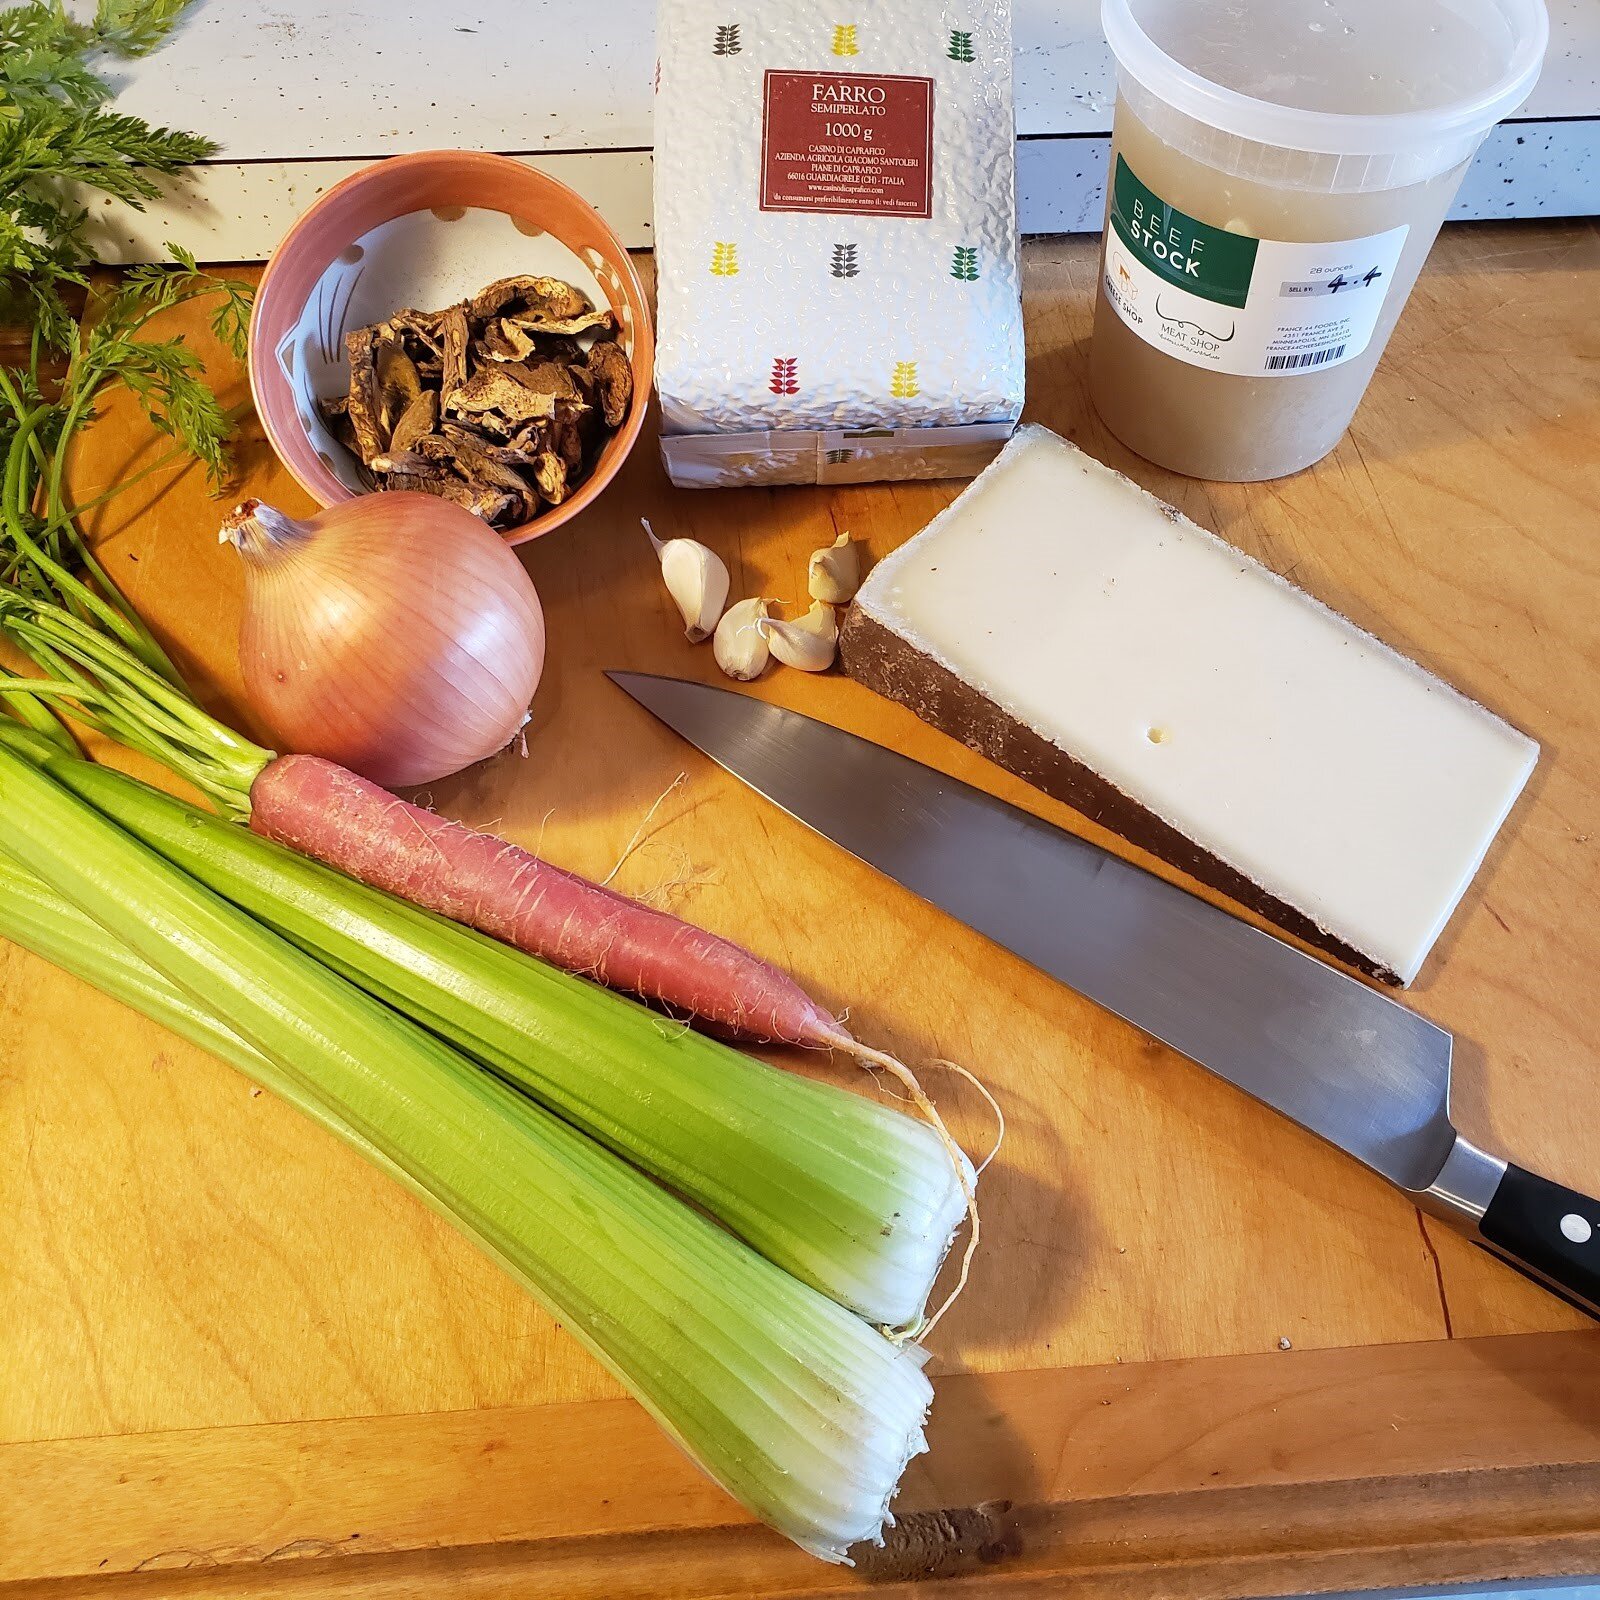
Carbs? Cheese? Wine? Yes please! Risotto is a classic rice dish from Northern Italy made from a few simple ingredients. With a little bit of elbow grease you can make stellar risotto at home. This preparation takes a few departures from the classic version you may know: I substitute Italian farro for rice, German Alex for Parmesan (blasphemy until you taste it!), and add in some celery and carrot to give it a little more body. Nutty and savory flavors from the farro, cheese, and mushrooms meet sweet lighter notes from the wine and veggies, and the whole dish is bound together with the best beef stock in town. And what better meal to eat with that bottle of wine you just opened?

Mushroom & Farro Risotto

2 c. (360g) Casino di Caprafico Farro

6 c. France 44 Beef Stock, simmering

1 Medium white onion, diced

2 Medium carrots, peeled and diced

3 Ribs celery, diced

4 cloves Garlic, minced

1 oz. Dried porcini mushrooms

6 oz. Alex (ask your Cheesemonger), grated and divided

½ c. Your favorite red wine

2 T. Extra virgin olive oil

2 T. Butter

Kosher salt

Black Pepper

Parsley to garnish 


  1. Soak mushrooms in boiling water for 30 min, or until tender. Drain, reserving soaking liquid, and chop. Set aside

  2. In a large dutch oven, heat olive oil and butter over medium high until shimmering. Add onion, carrot, and celery with a pinch of salt. Cook until onions are translucent and tender.

  3. Add garlic. Cook an additional minute or until fragrant.

  4. Add farro and mushrooms and turn to coat evenly.

  5. Add wine. Stir until alcohol has cooked off.

  6. Introduce hot stock to the pot one ladleful at a time, stirring constantly. Continue adding stock gradually and stirring until the farro has absorbed all six cups. The farro should be soft but still have some bite to it, and the sauce should be glossy and thick but not dry. If it needs more liquid, use the mushroom soaking liquid, more stock, or hot water.

  7. Add black pepper to taste and adjust salt. Stir in the Alex, saving a bit to garnish.

  8. Garnish with the rest of the cheese, parsley, and more black pepper.

farrorisotto.jpg
farrorisotto2.jpg

Jared’s Street Shawarma

Jared’s Street Shawarma

Serves 4

 This easy lamb shawarma is inspired by classic street food you can find all over the Middle East, from Egypt to Israel to Palestine. The yogurt marinade adds the perfect tangy tenderness to the lamb, and don’t skip out on the cornichon pickles — they cut through the richness and brighten up the whole party.

 This recipe also makes laffa, an Iraqi-Israeli flatbread to wrap up your shawarma, and tzatziki sauce, which pairs wonderfully with the Mediterranean spices. (And it’s convenient, because you’re already using many of the ingredients for the shawarma meat and toppings, too!) Hummus and amba, a fermented mango sauce, are other traditional spreads you could use as well. And in Israel, they’ll throw French fries in your shawarma too — feel free to go wild with toppings!


Ingredients:


From France 44:

·         1 lb fresh F44 lamb (chop, sirloin, shoulder steak, or T-bone are all fine!)

·         2 T New York Shuk Shawarma spice blend

·         ¾ cup Kalona Greek yogurt, divided (¼ cup for marinade; ½ cup for tzatziki sauce)

·         Cornichon pickles

·         Essex Lesbos feta cheese

·         2 balls of F44 pizza dough, thawed


From your pantry:

·         1 cucumber, cut in half (you’ll need both halves!)

·         2 cloves of garlic

·         1 T lemon juice

·         2 tsp olive oil, plus a little more for cooking

·         1 tsp dill

·         1 tomato

·         Kosher salt & pepper

 1.    Remove lamb bones (if necessary) and cut meat into small pieces, about 1 inch wide and ½ inch long.

2.    Combine ¼ cup yogurt, spice blend, and a pinch of kosher salt and pepper in a bowl. Add lamb and coat well with the yogurt marinade. Cover and refrigerate for at least an hour or overnight.

 3.            Meanwhile, prepare tzatziki sauce: Grate or mince half the cucumber (no need to peel it) and squeeze it out well. Grate/mince garlic.

4.            In a medium bowl, mix the remaining ½ cup yogurt, cucumber, garlic, lemon juice, olive oil, dill, and a pinch of salt. Cover and refrigerate to let the flavors combine while you keep cooking — this can be done the day before, too.

 5.            To cook the lamb: Sprinkle about 1 teaspoon of kosher salt over the meat. (If all you have is table salt, use ½ teaspoon.) Put about a teaspoon of olive oil into a frying pan over medium heat and add the lamb. Don’t rub off extra marinade; leave it on so it caramelizes.

6.            Saute, stirring often, until the meat is cooked through (at least 145ºF) and very crispy but not charred, around 10 minutes.

 7.            Meanwhile, prepare flatbread: Split both pizza dough balls in half. You can sprinkle a little flour if you need. Stretch out each piece until it’s approximately dinner-plate-sized, making sure not to poke any holes.

8.            Heat a large frying pan on medium-low. Working one flatbread at a time, drizzle a little olive oil on the pan and place the dough into the pan to fry.

9.            Flip when it becomes golden with a few brown spots — about 2-3 minutes per side. Store covered under a towel or in a warm oven to keep warm until ready to serve.

 10.          Prepare fixings: Chop cornichons, tomato, and the other half of the cucumber. 

 11.          Assemble: Lay out a flatbread on a plate and spread a layer of tzatziki. Add lamb down the center, and top with chopped cucumber and tomato, lots of cornichons, and crumbled Essex feta. Roll up in tin foil and enjoy!

Shawarma Photo 1.jpg
Shawarma Photo 2.jpg
Shawarma Photo 3.jpg

Dio’s refreshing shrub drink — yes even in winter.

shrub.jpeg

I am not usually one for making fancy cocktails, but shrubs are dear to my heart. I have made them on my own before (although that is usually a summertime project) and was delighted to see that we started carrying some of INNA shrub mixes - you might recognize them for their fantastic jams that we carry. 

Shrubs have three main ingredients: fruit, sugar, and vinegar. Historically, they were made as a way to preserve fruit, plus there’s the bonus health benefits of drinking vinegar (look it up, people have been doing it for ages!)

We carry a few different INNA shrub flavors but I opted for grapefruit, as that is one of my favorite flavors in general, plus I had some blood oranges at home to pair it with. Shrub cocktails (or mocktails) are super easy and customizable. I made mine with gin, but you can also add it to white wine to make a grapefruit aperitif, tequila for a grapefruit shrub paloma, (insert your alcohol of choice here), or hold the alcohol and just add it to seltzer water for a bright refreshing drink. 

No, it doesn’t taste too much like vinegar. Yes, it is delicious and great with herbs. 

I know I’m supposed to give you a complete recipe here, but it’s really just “add splashes until you like the taste”. Here’s what I made: 

  • 1 oz. Grapefruit Shrub

  • 1 oz. Gin

  • Seltzer (3-4oz)

  • Sprig of thyme

  • Freshly squeezed Blood Orange, plus some slices for aesthetic purpose

  • Serve over ice

 Get creative with this one! There are endless options. Enjoy.

Carol Ann's Speck Pasta

Speck Pasta

Serves 2-3


It’s early in the week, you can’t reward yourself with take-out just yet, but don’t really have much energy to dedicate towards cooking. This is the meal to make. You can be in and out of the kitchen in 30 minutes with this meal and have minimal clean up. There’s a good chance you have at least the onion in your pantry, you may even have the heavy whipping cream in your fridge (or half & half works in a pinch).

 Ingredients 

I package (250g) Pappardelle Egg Pasta

4 oz sliced Speck, cut in ¼ inch strips

1 medium onion diced

1 cup heavy whipping cream

4 oz Alpine cheese (such as Gruyere or Comte), grated

salt & pepper 

Vegetable oil


1.    Heat 2 tsp of vegetable oil in pan over medium high heat. Add speck, cook 2-4 minutes until crispy. Remove from pan with slotted spoon to paper towel lined plate.

2.    Heat 3 qts water in separate pot for pasta.

3.    Heat 1 TBSP vegetable oil in now empty pan over medium heat, add onions and ½ tsp salt. Cook until onions are softened 8-10 minutes. Add heavy whipping cream, lower heat to medium low, cook until slightly thickened 5-8 minutes.

4.    Add 1 tsp salt to boiling water cook pasta 2-4 minutes until al dente. Before draining, save ½ cup pasta water.

5.    Once sauce has thickened add grated cheese and salt and pepper to taste. Add pasta, coating noodles with sauce. Add pasta water 1 TBSP at a time until desired consistency is reached. Portion, noodles in bowls and serve with crispy speck on top!

caspeck1.png
caspeck2.png
caspeck3.png

On Managing a Meat Shop

nick_blog_star Here’s an interesting etymology: the word “manage” comes from the Italian “manèggiare,” or, “to put a horse through its paces” on the “manège,” a training area particularly for racing horses. What’s it been like managing a meat shop? I feel like I’ve had to learn the rules of horse racing, the regulations of horse training, the basics of horse physiology, and the philosophy of what it means to race horses, all while on horseback (though I’ve had lots of help). It’s been invigorating and fun, though I’d be lying if I told you my head wasn’t spinning. I think I like the way the horse training etymology works as a metaphor. Managing a meat shop, training a racing horse—mostly, what you are being asked to do is to take care of something that is important.

The role that I play as the general, day-to-day manager of the St. Paul Meat Shop is one of ensuring the soundness of its operations, and the delivery of the highest-possible quality of customer service. This latter item is something that I, personally, have cared about for a long time (of course, we are nothing—we are less than nothing—without being really, really on top of our day-to-day basic stuff!). I remember as a child growing up in Ann Arbor, Michigan, walking into Zingerman’s Delicatessen, being greeted by workers there who treated my family as if they already knew us, and then being given transcendentally delicious food to eat—the kind of food that, after the first bite, you just know is better than almost everything else you’ve ever eaten. The completeness of that experience is rare and special. I think we offer it at our cheese shops already: you can walk in, have somebody who is really nice in a basic human way offer you an artisanally-crafted, mind-blowingly tasty piece of cheese, and then be transported somewhere else by way of your taste buds.

The vision we have for the Meat Shop is very similar. We believe that you can raise animals for meat in an artisanal way—this goes beyond buzzwords like organic, local, sustainable, grass-fed, although these are all awesome principles and necessarily a part of what we do. The big idea is that there are some producers nearby who are really passionate about delicious meat, and have the know-how to make it happen. In theory, it’s not so different from affinage, or the art of aging or finishing a cheese. “Finishing” an animal on grass is an art, and “grass-fed,” on its own, simply isn't a guarantor of taste. We’ve found four farming partners who are doing great stuff, and we’re proud to be a market for them.

Returning to our horse racing metaphor, I’m only a trainer. The Meat Shop is the product of the passion of many people, starting with the farmers who raise their animals the way they believe is right, even in the face of a market that doesn’t always reward that conviction; continuing to our management and butchering team, whose collective belief in what food should taste like and what a retail experience should feel like is what animates our existence; and our amazing owner, who cares about good food, good wine, and about creating special opportunities for people to pursue these passions.

My part in this is to ensure we’re a reliable and friendly place to get awesome meat, but much of our shop’s functionality and personality is owed to our high-functioning and personable group of jockeys behind the counter, whom I would gladly buy meat from, but would also, were I in the neighborhood, perhaps just pop in to say hi to and maybe even consult for general advice. Managing a meat shop has been a lot of fun and a lot of hard work so far—now that we’re off to the races I hope you’ll come by and say “what’s up” to us soon!

--Nick Mangigian, Manager of the St. Paul Meat Shop

Order Online